
The Flow Blog
-

Can You Eat Protein Bars Every Day?
Yes, you can eat a protein bar every day, but with the right bar and the right approach. One bar daily is safe for most healthy adults and can support muscle recovery, appetite control, and protein goals. The key is choosing a bar with clean ingredients, keeping total daily intake to one to two bars, and treating them as a supplement to whole food, not a replacement for it.
Protein bars are now a daily habit for millions of Australians. Athletes, busy professionals, and fitness beginners all reach for them when life gets hectic. But is eating one every single day actually good for you, or does it come with hidden downsides?
Here's the honest, research-backed answer.
What Happens to Your Body When You Eat a Protein Bar Every Day?
The short answer is: mostly good things, if you choose wisely. Here's what the science says happens when a protein bar becomes part of your daily routine.
1. Your Muscles Recover Faster
Protein is essential for muscle repair. Every time you exercise, small muscle fibers tear and then rebuild. This process requires amino acids, which protein provides. Eating a bar daily ensures a steady supply of these building blocks.
Research consistently shows that people who meet their daily protein targets experience better muscle retention, faster recovery, and stronger overall performance outcomes compared to those who fall short.
2. You Feel Fuller for Longer
Protein is the most satiating macronutrient. A 2015 meta-analysis published in the American Journal of Clinical Nutrition found that higher protein diets significantly reduce appetite and calorie intake at subsequent meals.
A daily protein bar as a structured snack can reduce the 3pm hunger crash, lower total daily calorie intake, and stop mindless snacking on less nutritious options.
3. Your Blood Sugar Becomes More Stable
Unlike a high-carb snack, a protein bar with fibre and a moderate carbohydrate count slows glucose absorption. This results in a steadier energy curve, less brain fog in the afternoon, and a reduced risk of energy crashes.
This is especially relevant for active people and those looking to manage their weight.
4. You May Experience Digestive Discomfort (If You Choose Badly)
This is where daily protein bar habits can go wrong. Bars that use sugar alcohols like maltitol, erythritol, or sorbitol can cause bloating, gas, and diarrhoea in sensitive individuals.
Some bars also use inulin (chicory root fibre) as a filler, which ferments in the gut and can cause discomfort when eaten daily.
Pro Tip: If you experience bloating from a daily protein bar, check the label for sugar alcohols and high-fibre fillers. Switching to a bar with cleaner ingredients often resolves the issue immediately.
5. Your Nutrient Intake May Have Gaps
Whole foods deliver vitamins, minerals, antioxidants, and phytonutrients that bars simply cannot replicate. Eating one bar per day as a supplement is fine. Relying on bars for multiple meals daily can create nutritional blind spots.
Think of a protein bar as a bridge between meals, not the meal itself.
Flow Recovery Bar · Made in AustraliaPush Hard.
Recover Harder.Tired of fake-tasting bars that don't fill you up? 21g real protein, prebiotic fibre & zero junk — built for action sport athletes.
Grab a Box — $66 AUD →★★★★★ "Doesn't have that fake taste like other protein bars." — Verified BuyerIs Eating a Protein Bar Every Day Safe?
For most healthy adults, yes. Registered dietitian Lauren Manaker, writing for Prevention, noted that eating a protein bar daily as part of a balanced diet was associated with improved satiety, better muscle maintenance, and no adverse health effects.
Did You Know? A 2023 review in Nutrients found that protein supplements (including bars) did not cause kidney damage in healthy individuals, even at intakes up to 2.2g per kilogram of body weight per day. The kidney-damage concern applies mainly to people with pre-existing kidney disease. Source: Nutrients 2023. Read more: https://www.mdpi.com/2072-6643/15/13/2869
That said, safety depends on the quality of the bar you're eating. Not all protein bars are created equal.
The Ingredients That Make a Daily Protein Bar Safe or Problematic
Safe Ingredients to Look For
- Whey protein isolate, soy protein, or plant-based blends (pea, hemp, rice).
- Natural sweeteners such as dates, honey, or stevia in small amounts.
- Whole food sources: nuts, seeds, oats, dark chocolate.
- Fibre from whole grains or chia seeds rather than isolated inulin.
- Short ingredient lists (ideally under 10 ingredients).
Ingredients to Avoid When Eating Daily
- Sugar alcohols in large amounts: maltitol, sorbitol, erythritol (digestive issues).
- High-fructose corn syrup (spikes blood sugar and promotes fat storage).
- Artificial sweeteners: sucralose, acesulfame-K (potential gut microbiome effects).
- Soy protein isolate in high quantities (check if you have thyroid concerns).
- Palm kernel oil in large amounts (high saturated fat).
See our deep dive: 10 Ingredients to Look for in a High Quality Recovery Energy Bar for a complete ingredient checklist.
How Many Protein Bars Should You Eat Per Day?
Most nutrition experts agree that one bar per day is optimal for the average person. Here's a simple framework:
- One bar per day: Safe for most healthy adults. Complements whole-food meals effectively.
- Two bars per day: Acceptable for highly active people with elevated protein needs. Monitor your total daily calorie intake.
- Three or more per day: Not recommended. At this point you are replacing too many whole food meals and missing key nutrients.
The 'One Bar Rule' is a practical guide: treat your protein bar as a daily supplement, not a daily staple.
For context on daily protein needs, read: Is 21g of Protein Enough After Exercise?
The Real-World Test: What Happened When a Dietitian Ate a Protein Bar Every Day for a Week
In a widely-read Prevention experiment, registered dietitian Lauren Manaker ate a protein bar every single day for a week and documented the results. Here is what she found:
- Improved satiety between meals, with fewer afternoon hunger pangs.
- No digestive issues when using a bar with a clean ingredient profile.
- Sustained energy throughout the day, particularly in the mid-afternoon.
- Greater ease in hitting daily protein targets without adding excess calories from whole meals.
Her conclusion? A daily protein bar, when chosen wisely, is a practical tool for hitting protein goals and supporting recovery, particularly for women over 40 where muscle maintenance becomes increasingly important.
Daily Protein Bar Habits by Goal
Goal: Build Muscle
Eat your bar immediately after training. Choose one with at least 20g of protein and moderate carbohydrates. Consider adding a second bar before bed on hard training days to support overnight muscle protein synthesis.
Related: 6 Post Workout Recovery Rituals That Work Better Than Stretching Alone
Goal: Lose Weight
Use your bar as a structured mid-morning or mid-afternoon snack to prevent meal-to-meal overeating. Choose bars under 250 calories with at least 15g of protein and under 5g of added sugar.
A high-protein snack can reduce total daily calorie intake by reducing hunger hormones such as ghrelin. This is well-supported in the literature.
Goal: Improve Athletic Performance
Eat your bar 30 to 60 minutes before training for energy, and repeat post-training for recovery. If you're doing two sessions daily, a bar between sessions supports muscle repair between efforts.
See: 5 Signs Your Body Needs Better Recovery and How to Fix It Properly Now
Goal: Everyday Energy and Nutrition
Use your bar as a structured daily snack to top up protein between meals. Pair it with whole food meals that include vegetables, complex carbs, and healthy fats to ensure nutritional completeness.
Daily Protein Bar Checklist: How to Do It Right
- Choose a bar with 15g to 21g of protein and under 5g of added sugar.
- Read the ingredient list: fewer than 10 items, no artificial sweeteners or sugar alcohols in large quantities.
- Time your bar strategically: post-workout, mid-afternoon snack, or before bed.
- Pair it with whole foods at meals: vegetables, whole grains, lean proteins.
- Drink plenty of water: higher protein intake increases hydration needs slightly.
- Limit to one bar per day unless you are highly active or under professional guidance.
- Monitor digestion: if you experience bloating, switch brands or ingredients.
Daily Protein Bars vs Whole Food Protein: The Comparison
Protein bars should complement, not replace, whole food sources of protein. Here's how the two compare:
Chicken breast (100g): 31g protein | Micronutrients: iron, zinc, B vitamins | No sugar alcohols | Requires cooking.
Eggs (2 large): 12g protein | Healthy fats, choline, selenium | Highly bioavailable | Requires cooking.
Greek yoghurt (200g): 18g protein | Probiotics, calcium | Low cost | Requires refrigeration.
Protein bar (Flow Recovery Bar): 21g protein | Convenient | Portable | No cooking required | Fixed ingredient profile.
Each has its place. Whole foods win on micronutrients and bioavailability. Bars win on convenience and consistency.
For a complete guide to building your nutrition around recovery: Complete Home Recovery Setup: Ice Bath, Mouth Tape and Nutrition
Frequently Asked Questions (FAQ)
Q1. Is it bad to eat a protein bar every day?
No, it's not bad for most healthy adults. One protein bar per day, as part of a balanced diet, is considered safe and can support muscle recovery, hunger management, and protein targets. The issue arises only when bars replace too many whole-food meals or when the bar contains poor-quality ingredients.
Q2. Can eating protein bars every day cause weight gain?
Only if the bar adds calories beyond your daily maintenance needs. Most protein bars contain 180 to 300 calories. When eaten as a replacement for a less nutritious snack or as post-workout fuel, they are unlikely to cause weight gain. Eating them in addition to your regular meals without adjusting elsewhere could lead to a calorie surplus over time.
Q3. Will eating protein bars daily damage my kidneys?
No, not in healthy individuals. The myth that high protein intake damages kidneys applies specifically to people with pre-existing kidney disease. Multiple large-scale reviews have found no evidence of kidney damage from protein supplementation in healthy adults, even at elevated intake levels.
Q4. Can protein bars replace meals every day?
Occasionally, yes. Daily, no. Whole meals provide a range of vitamins, minerals, antioxidants, and dietary fibre that bars simply cannot replicate. A bar can bridge a gap when a meal isn't possible, but relying on bars for multiple meals per day will create nutrient deficiencies over time.
Q5. What is the best type of protein bar to eat every day?
Look for bars with 15 to 21g of protein, under 5g of added sugar, a short ingredient list with recognisable whole-food ingredients, no high-fructose corn syrup or large amounts of sugar alcohols, and moderate calories (180 to 280 per bar). The Flow Recovery Bar meets all of these criteria with 21g of protein per serve.
Q6. Can you eat protein bars every day without working out?
Yes. Protein isn't only for gym-goers. Everyone needs adequate daily protein to maintain muscle mass, support immune function, produce enzymes and hormones, and manage hunger. Even sedentary adults benefit from meeting their protein targets. A daily bar can help fill gaps in a busy lifestyle.
Q7. How does eating a daily protein bar compare to a protein shake?
Both work well, but for different situations. Bars are more portable, more filling (due to fibre and fat content), and slower to digest, making them better as meal supplements. Shakes are faster to absorb and easier on digestion, making them slightly better for immediate post-workout use. For a deeper comparison, read our guide on Protein Bar vs Protein Shake.
Q8. Are daily protein bars suitable for teenagers?
In general, whole food sources of protein are preferred for teenagers whose nutritional needs are high and varied. If a teenager struggles to meet protein targets from food alone, one bar per day is unlikely to cause harm. However, bars with high sugar or artificial sweetener content should be avoided, and a healthcare professional's advice is always best for growing individuals.
Vishal AhujaCan You Eat Protein Bars Every Day?
Yes, you can eat a protein bar every day, but with the right bar and the right approach. One bar daily is safe for most healthy adults and can support...
Vishal Ahuja


The Best Time to Eat an Energy Bar for Maximum Benefit
Quick Summary
The best time to eat an energy bar depends on your goal. Eating one 30–60 minutes before a workout provides quick fuel for performance, while consuming it within an hour after exercise supports recovery and muscle repair. Energy bars also work well between meals to prevent energy crashes or during travel when healthy food options are limited. Choosing a balanced bar and timing it correctly can help maintain steady energy, improve workouts, and support an active, busy lifestyle.
Understanding When an Energy Bar Works Best for Your Day
Energy bars have become one of the easiest ways to get quick fuel during a busy day. Whether you work long hours, train regularly, or simply need something filling between meals, having a reliable energy bar in your bag can make life a lot easier. But here is the thing many people overlook. The timing of when you eat at an energy bar can completely change the kind of benefit you get from it.
Some people choose them before a workout. Some rely on them when meals are far apart. And others reach for one right after exercising to speed up recovery. So, when is the best time to eat an energy bar for maximum effect? Let us break it down in a simple and relatable way.
Why Energy Bars Work So Well
Energy bars are designed to give you a blend of carbohydrates, protein, and fats in a compact format. They are easy to carry, do not spoil easily, and can keep your energy stable when your body needs it most.
Here are a few of the key reasons people use them.
- Quick fuel when meals are delayed
- A simple snack before or after a workout
- A convenient option while traveling
- A steady source of energy between meals
- Support for recovery when you have no access to proper food
If you choose the right bar, it can help you stay fuller for longer and avoid energy crashes that come from sugary snacks.
The Best Times to Eat an Energy Bar
Let us go through the most effective moments to enjoy an energy bar depending on your goals. Here is an easy way to understand the ideal timing based on your situation.
1. Before a Workout
Eating an energy bar before exercise can give you the carbohydrates your body needs to train well. The ideal time is around thirty to sixty minutes before you start. This provides enough time for digestion and prevents any heaviness.
|
Goal |
Ideal Timing |
Key Benefit |
|
Improve workout performance |
30–60 minutes before exercise |
Provides fast energy for muscles |
|
Support muscle recovery |
Within 60 minutes after exercise |
Replenishes glycogen and aids repair |
|
Control hunger between meals |
Mid-morning or mid-afternoon |
Prevents energy crashes and overeating |
|
Stay fueled during travel |
As needed |
Reliable nutrition when meals aren’t available |
|
Handle long workdays |
Between meals or during breaks |
Maintains focus and steady energy |
Best for
- Strength training
- Running
- Cycling
- High intensity workouts
- Morning routines when you do not want a full meal
Look for bars with moderate carbohydrates, a little protein, and minimal heavy fats, so digestion stays smooth.
2. After a Workout
Your muscles need fuel after exercising to recover. This is where energy bars shine. Eating one after training helps replenish glycogen and supports muscle repair. If you do not have a full meal ready, a balanced bar can make a big difference.
Best for
- Muscle recovery
- Reducing soreness
- Refueling quickly
- Supporting consistent training
Bars with a combination of carbohydrates and protein provide the best recovery benefits.
3. Between Meals
If you experience mid-morning or mid-afternoon hunger, an energy bar can help keep your energy stable. Many people use them to avoid overeating at the next meal or to prevent low energy slumps.
Best for
- Busy workdays
- Long meetings
- Students during study breaks
- Anyone with irregular meal timings
Just make sure to choose bars that do not contain excessive sugar. Balanced ingredients will keep you satisfied longer.
4. During Travel or Outdoor Activities
Energy bars make great travel companions. You can eat them on a flight, in the car, on a hike, or between activities. They save you from relying on unhealthy food choices when options are limited.
Best for
- Road trips
- Long flights
- Hiking
- Camping
- Days when you are constantly on the move
In these situations, timing matters less. The bar serves more as a reliable replacement when regular meals are unavailable.
When Not to Eat an Energy Bar
Even though energy bars are useful, there are a few times when they may not be ideal.
- Right before sleeping because it may feel heavy
- As a full meal replacement every day which can reduce nutrient variety
- If the bar has too much sugar which can cause an energy spike and crash
- Before intense exercise if the bar is very high in fat which slows digestion
Energy bars should support your diet, not dominate it. Whole foods should still be the foundation of your nutrition.
Tips to Get the Most Benefit from Your Energy Bar
Here are a few simple tips to help you choose and use energy bars in the most effective way.
- Pick bars with balanced protein, carbs and healthy fats
- Drink water alongside the bar to support digestion
- Pair bars with fruits or nuts if you need more calories
- Store bars in your bag or desk so they are always available
- Try different bar types to see which one's digest best for your body
When used smartly, energy bars can become a dependable part of your routine.
How the Flow Recovery Bar Fits into Your Day
The bar offered through Flow Recovery is formulated for people who need steady energy without artificial fillers or unnecessary sugar. It suits both pre-workout and post workout needs because it focuses on clean fuel, balanced ingredients, and easy digestion.
Whether you are heading to the gym, finishing a long run, or pushing through a demanding workday, it gives you the kind of nutrition that supports both energy and recovery. It also works well as a midday snack when your meals are spaced far apart.
Even though this blog is written for general education, the goal is to help you understand how timing can influence the benefits of the bar you choose.
Conclusion
Choosing the right time to eat at an energy bar can greatly increase how effective it is for your body. Whether you need fuel before exercise, recovery support afterward, or simply a reliable snack during a busy day, understanding timing helps you get the maximum benefit. Small decisions can make a big difference in how steady your energy feels throughout the day.
If you are looking for an option that delivers clean fuel, smooth digestion, and convenient nutrition, the Flow Recovery Bar is worth exploring. To experience the benefits for yourself, visit Flow Recovery to learn more about how our approach supports everyday performance and wellbeing.
Take the next step toward balanced and steady energy today.
Frequently Asked Questions
1. When is the best time to eat at an energy bar?
The best time depends on your goals. Before a workout for fuel, after a workout for recovery, between meals when hunger strikes, or during travel when healthy options are limited.
2. Should I eat at an energy bar before or after exercise?
Both can be helpful. Before exercising, an energy bar provides fuel. After exercising, it helps replenish energy stores and supports muscle recovery.
3. How long before a workout should I eat an energy bar?
Most people find thirty to sixty minutes before training works best. This gives your body enough time to digest the bar without feeling heavy.
4. Can an energy bar replace a meal?
An energy bar can work as an emergency meal when needed, but it should not replace whole meals regularly. It is better used as a snack or workout support.
5. Are energy bars good for weight management?
They can help prevent overeating by keeping you full between meals. However, weight management depends on overall diet, portion sizes and lifestyle choices.
6. Are energy bars suitable for busy workdays?
Yes. They are one of the easiest options when you have back to back meetings, limited break time or long commutes. They prevent energy crashes and keep hunger under control.
7. Can I eat an energy bar at night?
It is better to avoid eating one right before bed. Some bars contain carbohydrates or added sugars that may affect sleep or digestion.
8. Are energy bars good for travel?
Absolutely. They are convenient, do not spoil quickly and are useful when you do not have access to balanced meals during flights or long drives.
9. How do I choose the right energy bar?
Look for bars with balanced protein, carbohydrates and healthy fats. Avoid bars that contain large amounts of added sugar or artificial ingredients.
10. Can energy bars help with post workout soreness?
Yes. Eating a bar with both protein and carbohydrates after training can support faster recovery and help reduce muscle soreness.
Flow Recovery
The Best Time to Eat an Energy Bar for Maximum Benefit
Quick Summary The best time to eat an energy bar depends on your goal. Eating one 30–60 minutes before a workout provides quick fuel for performance, while consuming it within...
Flow Recovery

How to Set Up and Maintain Your Portable Ice Bath at Home
Quick Summary
Cold plunging is becoming a powerful wellness trend for recovery, stress relief, and mental clarity. Setting up a portable ice bath at home is simple you only need a flat surface, clean water, and ice. This guide walks you through selecting the right location, assembling the tub, achieving the right temperature, entering safely, and keeping your ice bath clean. It also includes solutions to common issues and tips to help you build a consistent cold-therapy routine. Whether you’re a beginner or a regular cold plunger, this step by step guide makes the entire process easy, safe, and enjoyable.
Why a Portable Ice Bath Works So Well at Home
A portable ice bath is designed for convenience. You can set it up almost anywhere, whether that is a balcony, a backyard corner, a bathroom, or even a spare room. This flexibility is one of the biggest reasons people choose a portable design over a built-in cold plunge.
Also read: How Much Ice to Use in a Cold Plunge: Get the Water Perfect Every Time
It is also ideal for small spaces. You do not need tools, plumbing, or permanent fixtures. Once you are done using it, you can drain it and store it away without any hassle.
And with products like the one from Flow Recovery, the material is insulated and sturdy enough to maintain cold temperatures while still being soft enough to sit comfortably. This balance is what makes portable ice baths appealing for beginners and regular users alike.
What You Need Before Getting Started
Setting up your portable ice bath does not require much. Here is what you will need before you start.
A clean and flat space
Access to clean water
A few bags of ice
A towel or mat for your feet
Optional items like a thermometer or a small stool
A flat and stable surface helps the tub keep its shape and stay easy to get in and out of. It can be indoors or outdoors. Just make sure you will not slip when stepping out.
If you want more control over your water temperature, a simple water thermometer can help you monitor how cold your bath gets. Most people aim somewhere between ten to fifteen degrees Celsius, but you can adjust based on what feels right for your body.
Portable Ice Bath Setup Overview Table
|
Action |
What You Need |
Tips for Best Results |
|
Choose location |
Flat indoor/outdoor space |
Avoid slippery areas & direct sunlight |
|
Assemble tub |
Portable ice bath + supports |
Ensure tub is fully expanded |
|
Fill with water |
Clean tap water |
Fill to waist/chest height |
|
Add ice |
1–3 bags depending on water temp |
Start mild if you’re new |
|
Check temperature |
Thermometer (optional) |
Aim for 10–15°C |
|
Enter slowly |
Towel/mat for grip |
Focus on slow breathing |
|
Maintain cleanliness |
Mild soap, clean water |
Rinse daily & clean weekly |
Step-by-Step Guide: Setting Up Your Portable Ice Bath
Step 1: Choose the Right Location
Pick a space that can handle splashes—bathrooms, patios, balconies, or gardens all work well. The area must be flat, stable, and safe.
Step 2: Unpack and Assemble the Tub
Most portable ice baths unfold easily. Set it in place, expand fully, and secure any support rings or panels.
Step 3: Fill the Tub with Water
Fill with cold tap water to your preferred depth—usually waist or chest height.
Step 4: Add Ice
Add 1–2 bags of ice to start. Increase the amount once you’re comfortable with colder temperatures.
Step 5: Check the Temperature
Use your hand or a thermometer. A brief shock is normal—take slow breaths and allow your body to adjust.
Step 6: Enter Slowly
Lower yourself gradually. Beginners usually stay 1–2 minutes, working up to longer sessions.
How to Maintain Your Portable Ice Bath
Keeping your portable ice bath clean and fresh is important. It not only protects your skin but also helps your tub last longer.
Daily Care
After each use, drain the water completely. Give the inside a quick rinse with clean water. This prevents small debris, sweat, or dirt from building up. Let the tub air dry completely before using it again or pack it away.
Weekly Care
Once a week, give the tub a gentle scrub with mild soap and water. Avoid harsh chemicals because they can damage the material over time. Rinse thoroughly to remove any soap residue and let it dry fully.
Water Quality Tips
Some people prefer to leave water in the tub for multiple uses, but this depends on how often you plunge. If you use it daily, it is best to refresh the water every one to two days. If you use it only a few times a week, change the water after each session for maximum cleanliness.
Storage
When you are not using your portable ice bath, make sure it is completely dry before folding or storing it. Keep it in a cool, dry space away from sharp objects or direct sunlight. This protects the material and keeps the tub in great condition for future use.
Troubleshooting: Common Issues & Solutions
|
Issue |
Solution |
|
Water not cold enough |
Add more ice; place tub in shade |
|
Tub uneven |
Adjust placement on a flatter surface |
|
Cold feels overwhelming |
Keep sessions short; warm hands/feet first |
|
Cloudy water |
Clean and refill |
Making Cold Plunging a Sustainable Habit
You don’t need long sessions—2–3 minutes is enough to experience benefits. Many people pair cold plunging with:
- Morning breathwork
- Meditation
- Post-workout recovery
- Mindfulness routines
Listen to your body. Consistency wins over intensity.
Conclusion
Setting up a portable ice bath at home does not have to be complicated. With the right space, a steady routine, and a little maintenance, you can enjoy the benefits of cold therapy whenever you need it. Whether you are using it for recovery, mental clarity, or stress relief, a portable ice bath gives you the freedom to create a wellness ritual that fits your lifestyle.
Flow Recovery offers a thoughtfully designed portable ice bath that makes cold plunging accessible for everyone. If you are ready to bring cold therapy into your home, explore the portable ice bath at Flow Recovery and take the first step toward a cooler, calmer, and more balanced routine.
Frequently Asked Questions
1. How cold should the water be in a portable ice bath?
Most people aim for water between ten to fifteen degrees Celsius. If you are new to cold exposure, you can start slightly warmer and gradually lower the temperature as your tolerance grows.
2. How much ice do I need to add to my portable ice bath?
It depends on the temperature of your tap water and your personal comfort level. Some users start with one or two bags of ice, while others prefer more for a deeper chill. You can adjust based on what feels right for you.
3. How long should I stay in a portable ice bath?
Beginners usually start with one to three minutes. Over time, you can increase your session length to five or even ten minutes if your body feels comfortable. The goal is to stay consistent, not to push too hard.
4. Where is the best place to set up a portable ice bath?
Bathrooms, balconies, patios, backyards, and even indoor corners work well. Choose a flat and stable surface that can handle a little water splashing and allows you to get in and out safely.
5. Do I need a thermometer for my portable ice bath?
A thermometer is optional but helpful. It gives you a clearer idea of how cold the water is and allows you to control your sessions with more accuracy, especially if you want to track progress.
6. How often should I clean my portable ice bath?
Give it a quick rinse after every session and a gentle wash with mild soap once a week. Regular cleaning helps maintain hygiene and extends the life of your ice bath.
7. Should I change the water after every use?
If you plunge only occasionally, it is best to change the water after each session. If you plunge daily, you can keep the water for one or two uses but should refresh it often to stay clean and clear.
8. What should I do if my portable ice bath develops a small leak?
First, make sure the leak is not from overfilling or an uneven surface. If it still leaks, check for any debris or small punctures. Many tubs come with repair patches. Keeping the tub on a smooth surface helps prevent future damage.
9. Is a portable ice bath safe to use every day?
For most people, yes. Daily sessions are common, but always listen to your body. If you feel overly tired, numb, or uncomfortable, take a break and shorten your sessions.
10. Can beginners safely use a portable ice bath?
Absolutely. Portable ice baths are beginner friendly. Start slow, keep your sessions short, and focus on steady breathing. Over time, your confidence and tolerance.
Flow Recovery
How to Set Up and Maintain Your Portable Ice Bath at Home
Quick Summary Cold plunging is becoming a powerful wellness trend for recovery, stress relief, and mental clarity. Setting up a portable ice bath at home is simple you only need...
Flow Recovery

7 Ways to Instantly Improve Your Sleep with Nasal Strips
Quick Summary
Nasal strips provide a simple, drug-free way to improve sleep by mechanically opening the nasal passages and increasing airflow. This helps reduce snoring, relieve congestion, support nasal breathing, and improve restorative sleep cycles. They are useful for athletes, allergy sufferers, and individuals dealing with narrow airways or a deviated septum.
Sleep quality affects energy, immune function, mood, and long-term wellness. Yet many people struggle to breathe properly at night due to nasal congestion, allergies, airflow limitations, or structural nasal issues. Nasal strips offer a non-invasive solution by widening the nasal passages and supporting smoother breathing.
Below are seven proven ways nasal strips can improve sleep quality and nighttime comfort.
Reduce Snoring by Improving Airflow
The most common cause of nighttime disruption occurs when the airflow through the nose is restricted during sleep, called snoring. Sleep causes the nasal passages to narrow, and as air moves through the throat in a more forceful manner, soft tissues vibrate creating sound.
Nasal strips use the opening of the nasal valve, the narrowest part of the airway. The increase in airflow lowers air turbulence and makes breathing quieter and efficient.
If you sleep with a partner, this simple change can make all the difference in knowing when to harmonize and when to silence.
Help Nasal Congestion Sufferers Breathe More Normally
However, some of the most common causes of yucky rest are colds, sinus infections , and seasonal allergies. Because the nose is blocked, the person is obliged to breathe through the mouth, which brings a dry throat, snoring, and continual turning and tossing.
Nasal strips are a non-medicated, non-spray, and non-chemical means of instant nasal relief by mechanically widening the nasal passages. It is what makes them especially good for:
- People sensitive to decongestants
- Individuals want a non-pharmaceutical option.
- Individuals experiencing temporary stuffiness caused by being sick
To some extent, this means wider and unobstructed blood flow in the body, and thus an abundant stream of oxygen that helps you fall and stay asleep.
Key Benefits of Nasal Strips
|
Benefit |
How It Helps |
Best For |
|
Reduces snoring |
Opens the nasal valve and smooths airflow |
Snorers and couples |
|
Eases congestion |
Widens nasal passages naturally |
Allergy and cold sufferers |
|
Enhances athlete recovery |
Improves oxygen intake during sleep |
Athletes and fitness users |
|
Encourages nasal breathing |
Reduces dry mouth and morning headaches |
Mouth breathers |
|
Supports deep sleep stages |
Helps maintain REM and slow-wave cycles |
Light sleepers |
|
Drug-free solution |
Avoids chemicals and dependency risks |
Pregnant women and older adults |
|
Aids deviated septum breathing |
Improves airflow temporarily |
Individuals with narrow passages |
Enhance Athlete and Fitness Sleep Quality
Optimal breathing takes place during training and relaxation as well, since athletes also need the latter. Good sleep is an integral part of physical recovery, muscle recovery, and hormonal stabilization.
By optimally drawing oxygen into the body at night, nasal strips may aid recovery. For athletes experiencing nighttime congestion or snoring, this has translated into major improvements in morning energy following consistent use of nasal strips.
Moreover, good nasal breathing stimulates the production of nitric oxide, an important driver of increased lung capacity, circulation, and performance.
Help Maintain Proper Mouth-Closed Sleep
Mouth breathing during sleep comes with various problems like dry mouth, interrupted oxygen flow, poor oral health, and headaches in the morning. It is quite common for mouth-breathing kids to roll in the direction of the mouth; nasal strips will promote nose-first breathing, but this type of breathing encourages mouth closed sleeping.
There are a number of physical benefits of nose breathing, including:
- Better filtration of air
- Improved humidification
- Better temperature regulation
- Less chance of drying you up overnight
People who mouth tape or practice habit-training techniques often combine these habits with nasal strips for an added effect.
For a complete breakdown and expert insights, visit the full blog at the link below.
Mouth Taping While You Sleep: Health Benefits, Risks & What the Latest Research Really Says
Less tired at Night & more tired in the Morning
Oxygen deprivation during the night often leads to poor sleep. It can not even a nasal blockage in the nasal area can force your body to struggle with breathing and go to a deeper stage of sleep.
Nasal strips enhance oxygen utilization, resulting in the body spending more time in restorative phases like:
- REM sleep
- Slow wave sleep
- Deep muscle-repair cycles
Consequently, people are waking up more refreshed, with greater alertness and less morning fog.
Provide a Safe, Drug-Free Sleep Aid Option
Hundreds of thousands of individuals want to avoid utilizing pharmaceutical components to fall asleep or nasal sprays because of the side effects or dependency risks. They are a safe and drug-free alternative without risk of long-term use can be used night after night.
They are safe for:
- Adults
- Older adults
- Teenagers
- Expectant mothers (Many pregnant women experience a stuffy nose during pregnancy)
Since they have no systemic effects, they are safe for long-term use along with other natural sleep aids like vaporizers, essential oils, or breath work.
For those With Deviated Septum or Tight Nasal Passages: Improve Breathing
Improve Breathing for Deviated Septums or Narrow Nasal Passages
Nasal strips will not fix a structural issue, but they can help open the nasal valve area and make breathing more comfortable. This may help reduce:
-
Snoring
-
Nighttime congestion
-
Mouth breathing
-
Sleep interruptions
They also serve as a cost-effective way to test whether improved nasal airflow provides relief before considering medical procedures.
Final Words
Nasal strips are a simple, science-backed tool that supports easier breathing and deeper sleep. They reduce snoring, improve airflow, relieve congestion, and encourage natural nasal breathing without medicine or invasive methods.
Flow Recovery nasal strips offer strong adhesion, comfortable wear, and effective lifting power, making them a reliable option for anyone looking to improve their sleep starting tonight.
Flow Recovery
7 Ways to Instantly Improve Your Sleep with Nasal Strips
Quick Summary Nasal strips provide a simple, drug-free way to improve sleep by mechanically opening the nasal passages and increasing airflow. This helps reduce snoring, relieve congestion, support nasal breathing,...
Flow Recovery

Top 10 Mouth Tape Providers in Australia (2026 Guide)
Quick Summary
Looking for the best mouth tape in Australia? This 2026 guide compares the top 10 mouth tape brands based on comfort, adhesion strength, price, and suitability for different users from beginners to heavy snorers and athletes. You’ll also learn how mouth taping may support nasal breathing, who should avoid it, and what features to consider before buying. If you want a safe, skin-friendly option to help reduce snoring and improve sleep quality, this guide will help you choose confidently.
Mouth taping is gaining momentum across Australia as a simple, non-invasive method to encourage nasal breathing during sleep. Supporters claim it may help reduce snoring, improve sleep quality, and prevent dry mouth by gently promoting breathing through the nose instead of the mouth.
According to sleep health guidance from the Australian Government Department of Health and Aged Care, healthy breathing patterns during sleep play an important role in oxygen regulation and overall wellbeing. Nasal breathing naturally filters, humidifies, and warms the air before it reaches the lungs — which may support more efficient respiration.
If you're considering trying mouth tape, choosing a high-quality, skin-safe product is essential for comfort, safety, and effectiveness. Below is a data-driven comparison of the top mouth tape brands available in Australia.
Quick Comparison: Best Mouth Tape Brands in Australia
|
Brand |
Typical Price (AUD) |
Adhesion Strength |
Best For |
|
Flow Recovery |
~$20 (30 strips, promo pricing) |
Strong but gentle |
Best overall |
|
Force Tape |
~$32 |
Strong |
Heavy snorers |
|
GOAT Co. |
~$39 |
Extra strong |
Beards / facial hair |
|
NakedLab |
~$33 |
Gentle |
Light snorers |
|
MyoTape |
~$44 |
Light resistance |
Beginners / claustrophobic users |
|
3M Nexcare |
Varies |
Moderate |
Budget option |
|
Dream Recovery |
Bundle pricing |
Gentle |
Eco-conscious users |
|
Tapeher |
Varies |
Gentle |
First-time users |
|
PureFlow |
Varies |
Moderate |
Athletes |
|
Omnifix (Leukoplast) |
Varies |
Strong medical adhesive |
DIY users |
Top 10 Mouth Tape Providers in Australia
1. Flow Recovery (Best Overall)
Flow Recovery is widely regarded as a leading mouth tape brand in Australia. Its hypoallergenic adhesive is designed to stay secure overnight while remaining gentle on sensitive skin.
Key Features:
-
Skin-friendly adhesive
-
Breathable material
-
Innovative slit design (allows sipping water without full removal)
- Designed for athletes and recovery-focused users
2. Dream Recovery
An eco-conscious option made with organic bamboo silk. Known for comfort and sustainability.
Best for: Sensitive skin and environmentally aware consumers.
3. GOAT Co.
Designed for strong overnight hold — even with facial hair.
Best for: Beards and heavy snorers.
4. Force Tape
Focuses on secure sealing for consistent nasal breathing.
Best for: Restless sleepers needing stronger adhesion.
5. Tapeher
Gentle and beginner-friendly.
Best for: First-time users easing into mouth taping.
6. MyoTape
Unlike full-seal tapes, MyoTape provides light resistance rather than complete closure.
Best for: Those who feel claustrophobic with traditional mouth tape.
7. NakedLab
Hypoallergenic and soft design.
Best for: Mild snorers and comfort-focused users.
8. PureFlow
Offers both mouth tape and nasal strips targeting athletic recovery.
Best for: Active individuals optimizing breathing performance.
9. 3M Nexcare Tape
Originally a medical tape, often used as a DIY mouth taping alternative.
Pros: Affordable, accessible
Note: Requires trimming and correct sizing
10. Omnifix (Leukoplast)
Medical-grade adhesive tape commonly repurposed for mouth taping.
Note: May adhere strongly — patch test recommended.
Why Nasal Breathing Matters During Sleep
Breathing through the nose helps:
-
Filter airborne particles
-
Humidify and warm incoming air
-
Support nitric oxide production (important for vascular function)
-
Reduce dry mouth and throat irritation
Research highlighted by the Sleep Health Foundation suggests that proper breathing patterns during sleep contribute to improved oxygen efficiency and sleep quality.
While mouth taping may encourage nasal breathing, it is not a treatment for obstructive sleep apnea or diagnosed breathing disorders.
How to Choose the Best Mouth Tape
When selecting a brand, consider:
✔ Material & Skin Sensitivity
Look for hypoallergenic, breathable fabric.
✔ Adhesion Level
Strong enough to last all night, gentle enough to remove easily.
✔ Beard Compatibility
Some brands are specifically designed for facial hair.
✔ Ease of Removal
Pre-cut strips save time and reduce irritation.
✔ Sustainability
Eco-friendly materials may appeal to environmentally conscious buyers.
Who Should Avoid Mouth Taping?
Mouth taping may not be suitable if you:
-
Have diagnosed sleep apnea
-
Experience chronic nasal obstruction
-
Have severe asthma or respiratory conditions
-
Are under 18 (without medical supervision)
-
Feel anxiety or panic when lips are sealed
Always consult a healthcare professional before starting if you have any breathing or sleep-related medical conditions.
Final Verdict: Which Mouth Tape Should You Choose?
For Australians seeking improved sleep quality, reduced snoring, and support for nasal breathing, Flow Recovery stands out as the most balanced option for comfort, performance, and affordability.
While several reputable brands are available, choosing a skin-safe, breathable, and properly fitted product is essential.
If you're new to mouth taping, start with a gentle option and monitor your comfort and breathing patterns carefully.
Frequently Asked Questions (FAQ)
1. Does mouth taping help reduce snoring?
Mouth taping may help reduce snoring that is caused by mouth breathing. By encouraging nasal breathing, it can promote quieter airflow. However, it does not treat medical conditions such as sleep apnea.
2. Is mouth taping safe for everyday use?
For healthy adults with clear nasal airways, mouth taping is generally considered low-risk when using skin-safe, hypoallergenic tape. If you have respiratory conditions, consult a healthcare professional before trying it.
3. Can mouth taping improve sleep quality?
Some users report deeper and more restful sleep when breathing through the nose. Nasal breathing supports natural air filtration and humidification, which may contribute to better sleep comfort.
4. What is the best mouth tape brand in Australia?
The best mouth tape depends on your needs. Flow Recovery is often considered a top choice due to comfort, affordability, and strong yet gentle adhesion. Beard-friendly and beginner options are also available from other brands.
5. Is mouth taping safe for people with sleep apnea?
No. Mouth taping is not a treatment for obstructive sleep apnea. Individuals diagnosed with sleep apnea should seek medical advice before considering mouth taping.
6. What type of tape should I use for mouth taping?
Use a hypoallergenic, breathable tape specifically designed for skin use. Medical-grade tapes like 3M Nexcare or purpose-built mouth tapes are safer than regular household tape.
7. Can I use mouth tape if I have a beard?
Yes, but you may need a stronger adhesive designed for facial hair. Some brands offer beard-friendly options with enhanced hold.
8. What happens if my nose gets blocked during the night?
If nasal breathing becomes difficult, remove the tape immediately. Mouth taping should only be used when nasal airways are clear and unobstructed.
9. Does mouth taping increase oxygen levels?
Mouth taping itself does not increase oxygen levels directly. However, nasal breathing helps filter, humidify, and regulate airflow more efficiently than mouth breathing.
10. How long does it take to see results from mouth taping?
Some users notice reduced dry mouth or snoring within a few nights. Others may take a few weeks to adapt to nasal breathing during sleep.
Flow Recovery
Top 10 Mouth Tape Providers in Australia (2026 Guide)
Quick Summary Looking for the best mouth tape in Australia? This 2026 guide compares the top 10 mouth tape brands based on comfort, adhesion strength, price, and suitability for different...
Flow Recovery

5 Best Recovery Tools After a Tough Workout - Ice Baths, Mouth Tape & More
Quick Summary
Recovering properly after a tough workout helps reduce muscle soreness, prevent injuries, and boost performance. Tools like ice baths, foam rollers, compression sleeves, mouth tape, and recovery mats can significantly improve muscle repair, sleep quality, and circulation. This guide breaks down the five best recovery tools and simple tips to help you feel your best after every workout.
Why Post-Workout Recovery Matters for Your Performance
After an intense training session, your body needs proper recovery to repair muscles, reduce tightness, and prepare for your next workout. Tools like ice baths, foam rollers, compression gear, and mouth tape can significantly improve how quickly your body rebounds.
Studies show that cold-water immersion reduces delayed onset muscle soreness (DOMS), inflammation, and fatigue, making recovery easier and faster. At Flow Recovery, our goal is to help athletes and everyday fitness lovers recover safely and effectively.
Comparison Table: Best Recovery Tools & Their Benefits
|
Recovery Tool |
Primary Benefit |
Best For |
|
Reduces inflammation & soreness |
Intense workouts, athletes, strength training |
|
|
Improves sleep & oxygen efficiency |
Sleep enhancement, breathing issues |
|
|
Foam Roller |
Relieves tight muscles |
Daily mobility, warm-ups, post-workout |
|
Compression Sleeves |
Improves blood flow & reduces swelling |
Runners, lifters, long sessions |
|
Recovery Mats |
Safety & hygiene during recovery |
Ice baths, stretching, foam rolling |
5 The Best Recovery Tools in Detail
1. Ice Baths / Cold-Water Immersion
Ice baths help your muscles feel less sore after hard workouts. They also lower swelling and make your body heal faster. After an ice bath, your muscles feel fresh, and you are ready for the next workout.

Benefits:
- Muscle soreness is lower and you feel less stiff.
- Your body heals faster so you can train again.
- Blood flow improves and helps muscles recover.
- You feel refreshed and ready for the next workout.
- Using ice baths often keeps muscles healthy and strong.
2. Mouth Tape
Mouth tape helps you breathe through your nose while sleeping. This makes your sleep better and helps your body recover. It also stops dry mouth and snoring, so you wake up feeling better and full of energy.
Benefits:
- Better sleep helps your body recover overnight.
- More oxygen while you sleep gives you more energy.
- Dry mouth and snoring are reduced.
- You wake up feeling fresh and ready for the day.
- Using mouth tape often helps your body repair naturally.
3. Massage Rollers / Foam Rollers
Foam rollers help make tight muscles soft and less sore. Rolling your muscles also improves blood flow and keeps them flexible. Using foam rollers after workouts helps your body recover faster and lowers the chance of injury.
Benefits:
- Tight muscles feel soft and less painful.
- Blood flow improves, so muscles recover faster.
- Stiffness after workouts is reduced.
- Flexible muscles help prevent injuries.
- Using a roller often keeps muscles strong and healthy.
4. Compression Sleeves / Socks
Compression sleeves and socks give gentle pressure to your muscles and joints. This helps blood flow, lowers swelling, and helps your body recover. You can wear them during or after exercise to feel less tired and recover faster.
Benefits:
- Blood flows better to tired muscles.
- Swelling and soreness are lower.
- Joints feel supported during workouts.
- Recovery is faster, so you can train again soon.
- Using compression gear makes recovery easier and safer.
5. Recovery Mats / Water Absorbent Mats
Recovery mats are helpful when using ice baths or doing floor exercises. They stop slipping, keep the area clean, and give a soft surface for stretching or rolling. Mats make your recovery safe and easy.
Benefits:
- Mats stop slipping and make the area safe.
- Your workout space stays clean.
- Soft surface makes stretching or rolling easier.
- Risk of injury is lower.
- Recovery feels easier and more comfortable.
Simple Ways to Speed Up Recovery After Workouts
1. Stay Hydrated
Water supports muscle repair and nutrient delivery.
2. Get Enough Sleep
Deep sleep helps repair muscle fibers and restore energy.
3. Eat Healthy Foods
Protein, fruits, and vegetables fuel recovery.
4. Use Recovery Tools Regularly
Consistency improves results and reduces soreness.
5. Stretch and Move Slowly
Light stretching keeps muscles flexible and reduces stiffness.
Conclusion
Taking care of your body after a tough workout is key to feeling better and staying strong. With Flow Recovery tools, like ice baths, mouth tape, nasal strips, and recovery mats, you can recover faster, sleep better, and reduce soreness. Our products make recovery easy and effective.
Check out the full range of recovery tools on our website and start feeling your best today.
Faqs:
1. What is the best way to recover after a tough workout?
The best way is to rest, stay hydrated, eat healthy, and use recovery tools like ice baths, foam rollers, or compression gear to help your muscles heal faster.
2. How often should I use an ice bath?
You can use an ice bath after very intense workouts, 1–3 times a week. Make sure the water isn’t too cold and limit your time to 10–15 minutes.
3. Can mouth tape really help with recovery?
Yes! Mouth tape helps you breathe through your nose while sleeping, which improves sleep quality and oxygen flow, helping your body repair and recover faster.
4. How long should I stretch after exercise?
Stretching for 5–10 minutes after a workout is enough. Light stretches or gentle movements help your muscles feel less tight and reduce soreness.
5. Do compression sleeves really work?
Yes, they help improve blood flow, reduce swelling, and support your muscles and joints. You can wear them during or after exercise to recover faster.
6. How can I make my recovery faster at home?
Drink plenty of water, eat healthy food, get enough sleep, and use simple recovery tools like foam rollers, ice baths, compression gear, and recovery mats to help your body heal.
Flow Recovery
5 Best Recovery Tools After a Tough Workout - Ice Baths, Mouth Tape & More
Quick Summary Recovering properly after a tough workout helps reduce muscle soreness, prevent injuries, and boost performance. Tools like ice baths, foam rollers, compression sleeves, mouth tape, and recovery mats...
Flow Recovery

Why Every Athlete Should Add a Portable Ice Bath to Their Home Gym
Quick Summary
A portable ice bath is one of the most effective recovery tools an athlete can add to a home gym. It reduces inflammation, speeds muscle repair, boosts circulation, strengthens mental resilience, and saves space, all while offering pro-level cold therapy at an affordable cost.
The Home Gym Recovery Gap
High-volume training creates micro-tears and inflammation. Iormal, but responsible for painful DOMS and next-day performance drops. Foam rolling and stretching help, but don’t create full systemic recovery.
A portable ice bath fills this gap by giving you fast, efficient recovery immediately after your session, right in your home gym.
Comparison Table: Portable Ice Bath vs Traditional Cold Plunge
|
Feature |
Portable Ice Bath |
Traditional Cold Plunge |
|
Cost |
Affordable |
Expensive (often $2,000+) |
|
Space Needed |
Minimal; foldable |
Large, fixed footprint |
|
Setup |
No plumbing; 2–5 minutes |
Requires installation |
|
Maintenance |
Easy drain & wipe |
More complex upkeep |
|
Portability |
Can move/store easily |
Permanently positioned |
|
Temperature Efficiency |
High insulation |
High efficiency but bulky |
|
Best For |
Home gyms, beginners, athletes on a budget |
Professional facilities |
The Power of Cold Plunge, Delivered Affordably
Our main focus is on cold therapy. We know the benefits are profound. Cold water immersion triggers vasoconstriction, the narrowing of your blood vessels. When you get out, those vessels rapidly dilate, causing a massive rush of nutrient-rich blood to your muscles. This action is a powerful way to flush out metabolic waste and reduce acute inflammation right where you need it most.
By adding a portable ice bath to your routine, you are making pro-level recovery an immediate possibility. No more driving to a specialty clinic. No more filling up your bathtub with countless bags of ice. Our portable ice baths are designed to be a durable, easy-to-set-up vessel that holds temperature efficiently. It’s the affordable way to access the recovery benefits of cold water:
-
Reduces Muscle Soreness: Greatly cuts the pain linked to delayed onset muscle soreness.
-
Boosts Circulation: Improves blood flow. Helps the body’s natural detox process.
- Enhances Mental Resilience: The cold shock trains your nervous system. It improves focus and stress tolerance.
Recovery Beyond the Soak: A Holistic Approach
We understand that peak performance needs a holistic approach. That means we do not stop at cold therapy. Our high-quality portable ice baths and advanced Ice Bath & Chiller systems support physical recovery. We also know that sleep and breathing matter.
Why is this important for an athlete’s home gym? The biggest gains happen when you’re asleep. If your intense training session leaves you wired, your recovery suffers. That’s why we also provide simple yet powerful tools to improve your sleep and breathing.
-
Mouth Tape: We offer specialized mouth tape to help you breathe through your nose all night. Nasal breathing is more efficient. It increases oxygen uptake. It activates the calming parasympathetic nervous system. This leads to deeper, more restorative sleep for faster physical repair.
-
Nasal Strips: For athletes needing maximum airflow, our nasal strips gently open the nasal passages. This helps steady, optimal nasal breathing, whether you're relaxing post-plunge or moving to a deep sleep cycle.
Better breathing boosts sleep quality and lowers stress. Combining cold plunge recovery with optimized sleep creates a home recovery platform.
Practical Perks of Going Portable
Why Athletes Prefer Portable Ice Baths
-
Space Saving: Foldable, easy to store
-
Fast Setup: Fill with ice/water and go, no installation
-
Insulated Build: Keeps water cold longer, reducing ice costs
-
Simple Maintenance: Drain, wipe, and refill every few days
Consistency is the key to better recovery and portable baths make daily use easy.
Make Recovery Your Competitive Edge Today
The best training programs include a robust recovery plan. As an athlete, investing in a portable ice bath is investing in your consistency, longevity, and performance potential. You remove the guesswork and the inconvenience of finding an external cold plunge solution. You make recovery a seamless part of your daily routine.
FAQs
1. How do I safely warm up after an ice bath?
Avoid hot showers right away. Get dressed in warm clothes or a dry towel. Have a hot drink like tea. Gentle movement helps your body naturally raise its core temperature slowly.
2. Can the portable bath be used inside a home gym?
Yes. The portable design works well indoors. Place it on a water-absorbent mat to manage splash and leakage. Make sure the space has good ventilation for moisture control.
3. What water temperature range is best for athletic recovery?
Most athletes use water between 10°C and 15°C. Start slowly. Colder is not always better. Consistency brings real results.
4. How often must I change the water in the portable bath?
We suggest changing the water every three to five uses for hygiene. A filtration system or chiller unit allows you to extend this period safely.
Flow Recovery
Why Every Athlete Should Add a Portable Ice Bath to Their Home Gym
Quick Summary A portable ice bath is one of the most effective recovery tools an athlete can add to a home gym. It reduces inflammation, speeds muscle repair, boosts circulation,...
Flow Recovery

Ice Bath Setup on a Budget: 5 Affordable Accessories You Shouldn’t Miss
Quick Summary
Looking to build an effective ice bath recovery setup without spending thousands? Start with a portable ice bath, then add a few low-cost accessories, silicone ice trays, a water-absorbent mat, mouth tape, and nasal strips, to dramatically improve your cold therapy experience. These budget-friendly tools help you stay consistent, boost physical recovery, and enhance sleep for long-term wellness benefits. Perfect for athletes and everyday users.
If you’ve ever struggled with post-workout soreness or that sluggish morning-after feeling, you’re not alone. Cold water immersion (ice bathing) is widely used by athletes to support muscle recovery and reduce inflammation. Research indicates cold exposure may help decrease muscle soreness, but professional cold plunge setups can be extremely costly.
For a deeper breakdown on how much ice you actually need for an effective cold plunge, check out this guide that explains how to get the temperature right every time.
How Much Ice to Use in a Cold Plunge: Get the Water Perfect Every Time
The Budget Foundation: The Portable Ice Bath
If you are serious about consistent cold plunging without the major investment, you need a reliable, portable ice bath. Our portable ice baths are made for budget-conscious users. They are durable and easy to fold. They also have strong insulation. This helps the water stay cold for longer, even without a chiller.
Ice Bath Setup on a Budget: 5 Affordable Accessories You Need
Once you have your portable bath, add a few extras. These small accessories change a simple setup into a solid recovery routine.
1. Start With the Right Base: Portable Ice Bath

A portable ice bath is the foundation of any budget-friendly cold therapy setup.
-
Easy to fold and assemble (no tools needed)
-
Durable with high insulation
-
Ideal for 5-10 minute immersion
- It offers similar recovery benefits to high-end plunge systems, without the hefty price tag.
2. Keep Costs Down With Silicone Ice Trays![]()
![]()
![]()
Buying ice regularly can be expensive. Instead, use large silicone trays for efficient ice creation.
-
Produces slow-melting blocks
-
Maintains temperature longer
-
One-time investment with long-term payoff
- Budget hack: Make several batches and freeze ahead for the week.
3. Add Comfort & Safety: Water-Absorbent Mat
- Cold therapy shouldn't be messy or risky.
-
Absorbs water instantly
-
Reduces slipping risk
-
Provides warm contact when exiting the ice bath
- This small item significantly improves the recovery transition.
4. Prioritize Sleep With Mouth Tape

Sleep is when true muscle repair happens.
-
Encourages nasal breathing
-
Supports oxygen efficiency
- Helps unlock deep sleep recovery
Pair this with cold therapy, and you may wake up more energized and resilient.
5. Improve Breathing Efficiency: Nasal Strips

Ideal for congested users or beginners to nasal breathing.
-
Opens nasal passages
-
Supports steady breathing during cold shock
-
Helps regulate heart rate under stress
Recovery doesn’t end when you leave the bath, breathing optimization is key.
Comparison Table: Cost vs. Benefit Breakdown
|
Accessory |
Purpose |
Cost Level |
Key Benefit |
Long-Term Savings |
|
Portable Ice Bath |
Cold immersion |
$$ |
Core recovery tool |
Avoids permanent setup cost |
|
Silicone Ice Trays |
Ice production |
$ |
Slow melting blocks |
Saves on store-bought ice |
|
Water-Absorbent Mat |
Safety & comfort |
$ |
Prevents slips, improves transition |
Low maintenance |
|
Mouth Tape |
Sleep optimization |
$ |
Enhances nasal breathing |
Improves recovery |
|
Nasal Strips |
Air flow support |
$ |
Reduces congestion |
Supports long-term breathing habits |
Making Recovery a Lifestyle
Building a quality recovery routine doesn’t mean emptying your savings account. Start with our portable ice bath. Use silicone ice trays. Place a water-absorbent mat. Include our specialized Mouth Tape and Nasal Strips. You create a powerful, professional-grade wellness center at home.
Flow Recovery offers high-quality portable Ice Baths and advanced Ice Bath & Chiller systems. We also believe recovery should be accessible. You might be an athlete. You might be starting your wellness journey. We ship our recovery gear free across Australia and New Zealand. Our goal is to make professional-level recovery easy for everyone. We want you to feel refreshed. We want you to perform better. You also get deeper and more restful sleep each night.
Ready to dip your toes into accessible cold therapy with us? Explore our gear today at Flow Recovery.
FAQs
1. What is the ideal temperature for an effective ice bath?
You should aim for water between 10°C and 15°C. This range gives you maximum benefit without major risk. Start at the warmer end. Work your way down.
2. How often should I use the portable ice bath?
Consistency is key. We suggest 3 to 5 plunges per week. Even short sessions of 2 to 5 minutes help reduce muscle soreness. They also improve your mental state.
3. How do I keep the water cold without a chiller?
Use the insulated lid to trap the cold. Change the water every 2 to 3 days for hygiene. Add new ice and cold tap water before your session for a fast temperature drop.
4. Are there any safety rules beginners must follow?
Yes. Never plunge alone. Stay in for no more than 10 minutes. If you have medical conditions, especially heart issues, speak to your doctor first. Safety comes first.
Flow Recovery
Ice Bath Setup on a Budget: 5 Affordable Accessories You Shouldn’t Miss
Quick Summary Looking to build an effective ice bath recovery setup without spending thousands? Start with a portable ice bath, then add a few low-cost accessories, silicone ice trays, a...
Flow Recovery

Ice Bath Guide - Duration, Temperature & Frequency for Maximum Benefits
Quick Summary
Ice baths offer powerful physical and mental recovery benefits by improving circulation, reducing inflammation, and boosting dopamine.
- Duration: Start with 30 sec–2 min; build up to 10 min max.
- Temperature: 10°C–15°C (50°F–59°F) is the optimal range.
- Frequency: 2–3 times per week for best results (11 min/week total).
- Timing: Morning for focus, post-workout for recovery.
Consistency beats intensity - start small, breathe calmly, and let your body adapt.
The Rise of Cold Therapy in Modern Wellness
Ice baths, once reserved for elite athletes, are now a cornerstone of recovery and wellness worldwide. From boosting energy to reducing inflammation, cold therapy (or cold water immersion) has become a go-to ritual for fitness enthusiasts, biohackers, and anyone seeking better focus and mental clarity.
But one question keeps coming up:
“How long should I stay in the ice bath, how cold should it be, and how often should I do it?”
Let’s break it down with science-backed guidance and practical advice.
Why Ice Baths Work: The Science Behind the Cold
When you immerse yourself in cold water, your blood vessels constrict (vasoconstriction) and blood moves toward your vital organs. This process enhances circulation, reduces muscle inflammation, and supports faster recovery after exercise.
A meta-analysis found that cold-water immersion (CWI) significantly reduces delayed-onset muscle soreness (DOMS)..
Cold exposure also triggers a surge in dopamine and endorphins, boosting mood, focus, and mental resilience. Human physiological responses to immersion into water of different temperatures”, a study showing plasma dopamine concentrations increased by ~250% during immersion in 14 °C water.
In short:
- Physical benefits: faster recovery, lower inflammation, improved circulation
- Mental benefits: increased dopamine, stress resilience, and calm focus
How Long Should You Stay in an Ice Bath?
If you’re new, you don’t need to stay long. Cold therapy is about consistency, not endurance.
| Experience Level | Recommended Duration | Notes |
|---|---|---|
| Beginner | 30 seconds – 2 minutes | Focus on breathing and control |
| Intermediate | 3 – 5 minutes | Start feeling deeper recovery |
| Advanced | Up to 10 minutes | Only if you’ve built tolerance |
A 2021 Frontiers in Sports Medicine study found that 11 minutes of total cold exposure per week (split into 2–4 sessions) is enough to gain significant recovery and mental benefits.
Finding the Right Ice Bath Temperature
Contrary to popular belief, colder isn’t always better.
- Beginners: 10°C to 15°C (50°F to 59°F)
- Intermediate: 7°C to 10°C (44°F to 50°F)
- Advanced: 5°C or below (only for trained individuals)
At Flow Recovery, we recommend starting at 12–15°C using a smart ice bath system with temperature monitoring. This ensures consistent results without the shock or risk of hypothermia.
Remember, adaptation > extremity. Gradual exposure trains your nervous system more effectively than pushing limits.
How Often Should You Take Ice Baths?
Just like exercise, recovery improves through rhythm.
- Beginners: 2–3 times per week
- Regular users: Up to 5 times per week
- Advanced: Short, daily sessions (2–4 min)
Consistency builds tolerance and maximizes long-term benefits such as improved metabolism, stronger immune response, and better sleep.
When’s the Best Time to Take an Ice Bath?
It depends on your goal:
| Time | Benefits |
|---|---|
| Morning | Boosts alertness & focus (dopamine surge) |
| Post-Workout | Reduces muscle soreness & inflammation |
| Evening | Calms the mind and improves sleep quality (for some) |
There’s no perfect time, only your time. The best ice bath is the one you can take regularly.
Common Mistakes to Avoid
Even simple routines can go wrong if rushed. Avoid these mistakes for a safe, enjoyable experience:
- Going too cold too fast
- Holding your breath (breathe slowly instead)
- Ignoring numbness or dizziness
- Jumping into hot water immediately after
- Treating it as a competition
Remember: Cold therapy is about mindfulness, not suffering. You win by staying calm, not by staying longest.
How to Warm Up After an Ice Bath (Safely)
What happens after your ice bath matters.
Warm up gradually, avoid sudden heat exposure. Instead:
- Dry off and layer up
- Move lightly (walk, stretch, or do mobility work)
- Sip warm fluids
- Wait 10–15 minutes before a hot shower
This gentle rewarming enhances circulation and helps the body regain equilibrium.
The Power of Breath and Mindset
Breathing is the bridge between the body and mind.
- Inhale deeply through your nose
- Exhale slowly through your mouth
Controlled breathing helps regulate your heart rate, reduces panic, and reinforces mental resilience.
Cold exposure becomes meditation in motion, a practice of presence, patience, and progress.
Cold Therapy as a Lifestyle Habit
The real magic happens when cold therapy becomes part of your lifestyle.
A few minutes each week can lead to:
- Higher energy & alertness
- Improved sleep
- Reduced stress levels
- Stronger mental focus
- Faster post-workout recovery
Make it part of your wellness rhythm, not a challenge, but a choice.
Conclusion: Find Your Flow in the Cold
Cold therapy is simple, powerful, and deeply personal. The ideal duration, temperature, and frequency vary for everyone, what matters most is starting small and staying consistent.
We believe recovery should feel natural and achievable. With the right mindset, tools, and routine, you can experience the benefits of cold exposure safely and confidently.
If you’re ready to begin your own cold therapy journey, we’re here to help you take that first step. Our recovery gear is designed to make the process easy, effective, and part of your everyday wellness routine.
Find your recovery rhythm with us.
Frequently Asked Questions
-
How long should I stay in an ice bath?
If you’re new to cold therapy, start with short sessions, around 30 seconds to 2 minutes. As your body adapts, you can slowly extend your time up to 10 minutes. You don’t need to stay in long to get the benefits. Consistency matters more than duration.
-
What’s the ideal temperature for an ice bath?
For most people, the sweet spot is between 10°C and 15°C. That range activates your body’s recovery response without overwhelming your system. You can go slightly colder once you build tolerance, but it’s best to progress slowly.
-
How often should I take an ice bath?
Two to three times per week is a great starting point. If your body responds well, you can move to short, daily sessions. The goal is to make it part of your wellness routine, something you can maintain comfortably over time.
-
Is there a best time of day to take an ice bath?
It depends on your goal.
Morning: boosts focus and energy.
Post-workout: helps muscle recovery.
Evening: promotes calm, but can feel energizing for some.
Try different times and see what fits your rhythm best.
-
Can I take an ice bath every day?
Yes, but you don’t need to. Short daily plunges can be beneficial if your body feels ready, but it’s okay to take rest days too. The body adapts through consistency, not exhaustion.
-
What happens if I stay in the cold for too long?
Staying too long can lead to numbness, dizziness, or mild hypothermia. Always listen to your body. If you start to shiver uncontrollably or lose feeling in your hands and feet, it’s time to get out and warm up gradually.
-
How do I warm up after an ice bath?
Dry off, put on warm clothes, and move around gently. Let your body heat up naturally before taking a hot shower. Light stretching, walking, or deep breathing helps your circulation return to normal.
-
Do I need to use ice every time?
Not necessarily. You can use temperature-controlled tubs or simply turn your shower cold. The goal is consistent exposure, not the amount of ice. Even a moderately cold setup provides excellent benefits when done regularly.
-
Can ice baths improve my mental health?
Yes. Cold therapy helps balance your nervous system and boosts dopamine, which improves mood and focus. Many people find that regular cold exposure reduces anxiety, increases resilience, and creates a lasting sense of calm.
-
How can I make my ice bath experience easier as a beginner?
Start small and breathe deeply. Focus on slow, steady breathing rather than the cold itself. Prepare everything before you start so you can enter calmly. Over time, your confidence and comfort will naturally grow.
Flow Recovery
Ice Bath Guide - Duration, Temperature & Frequency for Maximum Benefits
Quick Summary Ice baths offer powerful physical and mental recovery benefits by improving circulation, reducing inflammation, and boosting dopamine. Duration: Start with 30 sec–2 min; build up to 10 min...
Flow Recovery

Top 5 Best Ice Bath Suppliers in Australia
Key Takeaways
- Cold water therapy reduces muscle soreness by up to 20% (2025 meta-analysis)
- Australia's ice bath market grew 24% in 2024, reaching $8.7M
- Optimal recovery: 11-15°C for 10-15 minutes post-exercise
- Budget options start at $500; premium systems reach $8,000
- WiFi-enabled chillers now dominate 40% of the market
Quick Comparison Table
|
Supplier |
Key Strength |
Price Range |
Warranty |
Best For |
|
Flow Recovery |
WiFi control + portability |
$900–$4,500 |
2 years |
Home athletes, travelers |
|
Syochi |
Commercial-grade filtration |
$2,000–$7,000 |
3 years |
Gyms, rehab centers |
|
Mind & Body Recovery |
Ergonomic luxury design |
$1,100–$3,800 |
2 years |
Wellness studios, homes |
|
The Cold Plunge Co. |
Beginner-friendly setup |
$500–$900 |
1 year |
First-timers, small spaces |
|
Chill Tub Australia |
Spa-level automation |
$3,000–$8,000 |
3 years |
Luxury homes, spas |
The Science Behind These Rankings
What Makes an Ice Bath Effective?
A 2025 network meta-analysis published in the Journal of Sports Science found cold water immersion at 11-15°C for 10-15 minutes most effectively reduces muscle soreness and inflammation markers after intense exercise.
Key Performance Factors We Evaluated:
- Temperature Control Accuracy (±1°C)
- Insulation Quality (heat retention for 2+ hours)
- Water Filtration (removes 99%+ contaminants)
- Durability (5+ year lifespan under regular use)
- Safety Certifications (CE, SAA, ETL standards)
Market Context: Why Australia's Ice Bath Industry Matters
The Australian cold therapy market has experienced explosive growth:
- Market Size: $8.7M in 2023 → projected $12.5M by 2030
- Growth Rate: 5.3% CAGR (2024-2030)
- User Adoption: 86% of regular users report reduced muscle pain
- Product Innovation: Portable tubs outsold fixed systems for the first time in 2024
Source: Australian Wellness Industry Report 2024, Sports Medicine Australia
Top 5 Ice Bath Suppliers in Australia - Detailed Reviews
1. Flow Recovery
Overall Rating: 4.8/5
Flow Recovery distinguishes itself through practical innovation and user-centric design. Their flagship Daily Ice Bath & Chiller combines WiFi-enabled temperature control with military-grade insulation, making it ideal for Australia's extreme climate variations.
The portable ice bath model is perfect for travelers and small spaces. Unique accessories like sleep aids and mouth tape offer added wellness. Every product is tested and refined for real-world durability - plus, Flow Recovery emphasizes holistic wellbeing beyond muscle recovery.
What Sets Flow Apart:
Technology Integration:
- Smart Temperature Control: Adjust settings remotely via smartphone app
- Real-Time Monitoring: Track water temp, usage stats, and maintenance alerts
- Energy Efficiency: 40% lower power consumption vs. competitors
Build Quality:
- 6-layer insulation maintains temperature for 3+ hours
- UV-resistant exterior (crucial for Australian outdoor use)
- Reinforced seams withstand 500+ cycles
Holistic Wellness Approach: Beyond cold therapy, Flow Recovery offers complementary products:
- Mouth tape for improved sleep quality
- Nasal strips to optimize breathing
- Guided recovery protocols via their 4 Weeks to Flow program
Customer Feedback Highlights:
- "Setup took 15 minutes, maintenance is minimal" - Sarah M., Sydney
- "WiFi control means I can prep my bath from the gym" - James L., Melbourne
- "Best investment for post-training recovery" - Emma K., Brisbane
Ideal For: Home athletes, CrossFit enthusiasts, runners, weekend warriors who want professional-grade recovery without commercial complexity.
Price Breakdown:
- Portable Ice Bath: $90 AUD (entry-level)
- Daily Ice Bath: $1200 AUD (mid-range with insulation)
- Daily Ice Bath & Chiller Bundle: $3600 AUD (premium with automation)
2. Syochi - Commercial-Grade Reliability
Overall Rating: 4.6/5
Established in 2009, Syochi brings engineering excellence and international credibility to the Australian market. Their systems are the go-to choice for professional sports teams and rehabilitation centers.
Engineering Excellence:
Filtration Technology:
- 4-layer water purification system
- Removes bacteria, debris, and chlorine byproducts
- Anti-oxidation copper piping extends system life by 30%
Certifications:
- CE (European safety standards)
- ETL (North American testing)
- SAA (Australian/New Zealand compliance)
Performance Specs:
- Cools water from 25°C to 3°C in 4-6 hours
- Maintains temperature ±0.5°C accuracy
- Operates quietly at 45-50 decibels
Commercial Support:
- Australian-based technical team
- 24-48 hour warranty response time
- Bulk purchasing discounts for gyms/studios
Customer Testimonials:
- "Powers our entire elite training facility" - Melbourne Storm Training Staff
- "Zero maintenance issues in 18 months" - CrossFit Box Owner, Perth
Ideal For: Gym owners, physiotherapy clinics, professional sports teams, high-volume users requiring industrial durability.
Price Range: $2,000 (portable barrel) to $7,000 (commercial plunge system)
3. Mind & Body Recovery Co. - Boutique Luxury
Overall Rating: 4.5/5
Where functionality meets aesthetics, Mind & Body Recovery Co. appeals to design-conscious consumers who refuse to compromise on performance.
Design Philosophy:
Aesthetic Integration:
- Modern matte finishes (black, grey, stone)
- Ergonomic contouring reduces pressure points
- Minimalist controls blend into home décor
Material Quality:
- Medical-grade stainless steel interior
- Eco-friendly composite exterior
- Scratch-resistant, easy-clean surfaces
User Experience:
- Whisper-quiet chillers (40 decibels)
- LED mood lighting (optional)
- Built-in seating ledges for comfort
Service Excellence:
- Personalized consultations for home/studio setup
- White-glove delivery and installation
- Extended warranty options available
Customer Reviews:
- "Looks like a luxury spa piece" - Interior Designer, Sydney
- "Comfortable enough for 15-minute sessions" - Yoga Studio Owner, Gold Coast
Ideal For: Wellness studios, luxury homes, health-conscious professionals prioritizing both performance and aesthetics.
Price Range: $1,100–$3,800
4. The Cold Plunge Co. - Budget-Friendly Entry Point
Overall Rating: 4.3/5
The Cold Plunge Co. democratizes cold therapy by removing barriers to entry. Their products prioritize simplicity, affordability, and accessibility.
Accessibility Features:
No-Chiller Design:
- Add ice and water – ready in 10 minutes
- No electrical setup required
- Perfect for renters and temporary spaces
Portability:
- Weighs just 3kg when empty
- Folds to backpack size
- Travel-friendly for athletes on the road
Durability:
- Military-spec drop-stitch fabric
- Reinforced PVC withstands sharp ice edges
- Quick-drain valve empties tub in 2 minutes
Value Proposition:
- Entry price: $499 (vs. $2,000+ for chiller systems)
- Low ongoing costs (no electricity/maintenance)
- Upgrade path available (add chiller later)
Customer Feedback:
- "Perfect starter tub while I test the habit" - Running Enthusiast, Adelaide
- "Holds temperature better than expected" - Budget-Conscious Athlete, Hobart
Ideal For: Beginners, budget-conscious buyers, renters, travelers, those testing cold therapy before major investment.
Price Range: $500–$900
Related Guide: Can you get a quality ice bath for under $150?
5. Chill Tub Australia - Premium Spa Experience
Overall Rating: 4.7/5
Chill Tub Australia delivers commercial spa quality for residential and high-end wellness facilities. Their systems represent the pinnacle of cold therapy technology.
Premium Features:
Advanced Automation:
- Programmable temperature schedules
- Self-cleaning UV sanitation
- Smart diagnostics with predictive maintenance
Material Excellence:
- Marine-grade acrylic or timber finishes
- 316-grade stainless steel (superior corrosion resistance)
- 3-inch insulation (vs. 1-inch industry standard)
Performance:
- Rapid cooling: 25°C to 3°C in 2 hours
- Temperature stability: ±0.3°C variance
- Multi-stage filtration (UV + ozone + carbon)
Installation & Support:
- Professional setup included
- 3-year comprehensive warranty
- Annual maintenance package available
Customer Testimonials:
- "Transformed our spa's recovery offerings" - Day Spa Owner, Noosa
- "Worth every dollar for serious athletes" - Triathlete, Canberra
Ideal For: Luxury homes, professional spas, elite athletes, commercial wellness centers demanding zero-compromise performance.
Price Range: $3,000–$8,000
How to Choose Your Ideal Ice Bath
Step 1: Define Your Goals
Recovery-Focused Users:
- Target: Reduce muscle soreness post-workout
- Need: Precise temperature control (11-15°C)
- Recommended: Flow Recovery, Syochi, Chill Tub
Mental Wellness Users:
- Target: Stress reduction, mood improvement
- Need: Comfortable, daily-use design
- Recommended: Mind & Body Recovery, Flow Recovery
Performance Athletes:
- Target: Optimize training adaptations
- Need: Commercial-grade durability
- Recommended: Syochi, Chill Tub
Step 2: Assess Your Space
Small Spaces (Apartment Balconies, Bathrooms):
- Solution: Portable/inflatable models
- Brands: The Cold Plunge Co., Flow Recovery Portable
Dedicated Home Gyms:
- Solution: Permanent installations with chillers
- Brands: Flow Recovery Daily, Mind & Body Recovery
Commercial Facilities:
- Solution: High-capacity, durable systems
- Brands: Syochi, Chill Tub, Revel
Step 3: Budget Planning
|
Budget Tier |
What You Get |
Recommended Suppliers |
|
Entry ($500-$1,000) |
Portable tub, manual ice, basic insulation |
Cold Plunge Co., Flow Portable |
|
Mid ($1,000-$3,000) |
Enhanced insulation, digital controls, better materials |
Flow Daily, Mind & Body |
|
Premium ($3,000-$5,000) |
Chiller included, advanced filtration, WiFi |
Flow Daily & Chiller, Syochi |
|
Luxury ($5,000+) |
Commercial-grade, automation, premium finishes |
Chill Tub, Syochi Pro, Vital+ |
Hidden Costs to Consider:
- Electricity: $30-80/month (chiller systems)
- Water treatment: $10-20/month
- Ice: $15-30/week (non-chiller models)
- Maintenance: $100-300/year
Step 4: Temperature Control Preference
Manual (Ice-Based):
- Pros: No electricity, portable, low upfront cost
- Cons: Inconsistent temps, ongoing ice costs, prep time
- Best For: Beginners, occasional users
Chiller Systems:
- Pros: Precise control, set-and-forget, long-term savings
- Cons: Higher initial cost, installation required
- Best For: Regular users (3+ times/week)
Step 5: Evaluate Warranty & Support
Red Flags:
- Warranty <1 year
- No Australian-based support
- Unclear return policy
- Generic contact emails
Green Flags:
- 2+ year comprehensive warranty
- Local phone support
- Installation assistance
- Active customer community
Safety Guidelines for Cold Water Therapy
Medical Clearance Recommended
Consult your doctor before starting if you have:
- Cardiovascular conditions (heart disease, high blood pressure)
- Raynaud's syndrome or circulation disorders
- Pregnancy or trying to conceive
- Cold urticaria (allergic reaction to cold)
- Diabetes or peripheral neuropathy
Source: Australian Sports Medicine Guidelines
Beginner Protocol
Week 1-2: Adaptation Phase
- Temperature: 15-18°C (mild cold)
- Duration: 2-3 minutes
- Frequency: Every other day
- Goal: Build tolerance
Week 3-4: Building Resilience
- Temperature: 12-15°C
- Duration: 5-8 minutes
- Frequency: 3-4 times/week
- Goal: Establish habit
Week 5+: Optimization
- Temperature: 10-15°C
- Duration: 8-12 minutes
- Frequency: 4-6 times/week
- Goal: Maximize benefits
Warning Signs to Stop Immediately
- Excessive shivering (uncontrollable)
- Numbness spreading beyond extremities
- Dizziness or disorientation
- Chest pain or irregular heartbeat
- Severe shortness of breath
- Extreme skin color changes (blue/white)
Emergency Response: Exit water, dry off, warm gradually with blankets. Seek medical attention if symptoms persist.
Post-Bath Recovery
DO:
- Dry off thoroughly
- Warm up gradually (room temp first)
- Drink warm fluids
- Move gently to restore circulation
- Layer clothing progressively
DON'T:
- Jump into hot shower immediately
- Consume alcohol (impairs thermoregulation)
- Exercise intensely right after
- Ignore persistent discomfort
Why Cold Therapy Works: The Science Explained
Physiological Mechanisms
1. Vasoconstriction → Vasodilation Cold exposure causes blood vessels to constrict, then dilate upon rewarming. This "vascular gymnastics" improves circulation and delivers fresh oxygen/nutrients to tissues.
2. Inflammation Reduction Cold water immersion significantly reduces inflammatory markers like IL-6 and CRP, accelerating recovery from exercise-induced damage.
3. Endorphin Release Cold stress triggers endorphin production, creating natural pain relief and mood elevation comparable to "runner's high."
4. Nervous System Reset Cold activates the parasympathetic nervous system, reducing cortisol (stress hormone) and promoting relaxation.
Evidence-Based Benefits
|
Benefit |
Evidence Level |
Optimal Protocol |
|
Muscle soreness reduction |
Strong |
11-15°C, 10-15 min post-exercise |
|
Enhanced recovery |
Strong |
Within 1 hour of training |
|
Improved sleep quality |
Moderate |
Evening sessions, 6+ hours before bed |
|
Mental clarity boost |
Moderate |
Morning sessions, 3-5°C, 2-3 min |
|
Brown fat activation |
Emerging |
14-15°C, 11+ min, regular exposure |
Evidence levels based on systematic reviews and meta-analyses
Dive Deeper: The science-backed benefits of ice baths
Mental Health Benefits
Beyond physical recovery, cold immersion offers psychological advantages:
- Stress Resilience: Regular exposure trains stress response systems
- Mood Regulation: Dopamine increases can last hours post-bath
- Mental Toughness: Voluntary discomfort builds psychological resilience
- Present-Moment Awareness: Cold forces mindful breathing and focus
Learn More: Real user experiences with cold therapy
Essential Ice Bath Accessories
Enhance your cold therapy setup with these complementary products:
Must-Have Accessories
-
Floating Thermometer - $19.99
- Accurate to ±0.5°C
- Shatterproof design
- Large display for easy reading
2. Silicone Ice Trays (3-Pack) - $29.99
- Creates larger ice blocks
- Slow-melting for consistent temp
- BPA-free food-grade silicone
3. Water Absorbent Mats - $34.99
- Microfiber technology
- Prevents slipping hazards
- Quick-drying, machine washable
4. 4 Weeks to Flow E-Book - $9.99
- Structured progression protocol
- Breathing techniques
- Recovery optimization strategies
Frequently Asked Questions
How long should I stay in an ice bath?
Beginners: Start with 2-3 minutes at 15-18°C. Your body needs time to adapt to cold stress.
Intermediate Users: After 2-3 weeks, extend to 5-8 minutes at 12-15°C.
Advanced Users: Work up to 10-15 minutes at 10-15°C. Research shows diminishing returns beyond 15 minutes for most recovery goals.
Important: Listen to your body. If you're shivering uncontrollably or feel numb, exit immediately regardless of time.
Comprehensive Guide: Optimal ice bath duration
What's the ideal temperature for an ice bath?
Science-Backed Range: 10-15°C (50-59°F) provides optimal recovery benefits according to sports medicine research.
Temperature Guidelines by Goal:
- Muscle Recovery: 11-15°C
- Mental Resilience: 3-10°C (shorter duration)
- Beginners: 15-18°C (comfortable adaptation)
- Weight Loss/Brown Fat: 14-15°C (longer sessions)
Pro Tip: Use a reliable thermometer. Many users misjudge water temperature by feel alone.
Can I take an ice bath every day?
Short Answer: Yes, but start gradually.
Recommended Frequency:
- Beginners: 2-3 times/week for first month
- Intermediate: 3-5 times/week after adaptation
- Advanced: Daily sessions are safe if tolerated
Consider Rest Days If:
- Feeling chronically fatigued
- Sleep quality declining
- Increased resting heart rate
- Loss of motivation
Listen to Your Body: 86% of regular users report positive outcomes, but individual response varies.
Detailed Guidance: How often should you ice bath?
Do I need a chiller, or can I just use ice?
Ice-Only Approach:
- Pros: Low upfront cost ($500-900), no electricity, portable
- Cons: Inconsistent temperature, ongoing ice costs ($60-120/month), prep time
Chiller System:
- Pros: Precise control, convenience, long-term cost savings
- Cons: Higher initial investment ($2,000-5,000), requires space/power
Cost Comparison (12 months):
- Ice-only: $500 tub + $960 ice = $1,460
- Chiller system: $4,500 + $480 electricity = $4,980
Break-Even: If using 4+ times/week, chiller pays for itself within 18-24 months.
Decision Framework: Inflatable tubs vs. chiller systems
Are ice baths only for athletes?
Absolutely not. Ice baths benefit anyone seeking:
Physical Benefits:
- Reduced inflammation (arthritis, chronic pain)
- Improved circulation
- Faster post-workout recovery
- Immune system support
Mental Benefits:
- Stress relief (cortisol reduction)
- Enhanced mood (endorphin release)
- Better sleep quality
- Increased mental resilience
User Demographics:
- Office workers managing stress
- Parents recovering from daily demands
- Chronic pain sufferers
- Wellness enthusiasts
- Competitive athletes
Real Stories: A month of ice baths: one user's experience
Can ice baths help with mental health?
Research-Backed Evidence: Yes, through multiple mechanisms.
Neurochemical Changes:
- Dopamine increases up to 250% (lasting 2-3 hours)
- Norepinephrine elevation improves focus
- Endorphin release creates natural euphoria
Psychological Benefits:
- Builds voluntary discomfort tolerance
- Enhances stress resilience (adaptive response)
- Improves emotional regulation
- Provides meditative mindfulness opportunity
Important Note: Ice baths complement, not replace, professional mental health treatment.
Clinical Perspective: Some therapists incorporate "cold exposure therapy" for anxiety management, but always consult healthcare providers.
Is it safe to take an ice bath at home?
Yes, with proper precautions:
Safety Checklist:
- ✓ Medical clearance (if applicable)
- ✓ Start warm (15-18°C) and brief (2-3 min)
- ✓ Never alone (first several sessions)
- ✓ Phone accessible in emergency
- ✓ Gradual warm-up protocol planned
- ✓ Avoid alcohol before/after
Risk Factors Requiring Medical Approval:
- Heart conditions or high blood pressure
- Circulatory disorders
- Pregnancy
- Cold allergies (urticaria)
- Recent surgery or injury
Emergency Protocol: If experiencing severe symptoms (chest pain, extreme disorientation), exit immediately, dry off, call emergency services if symptoms don't improve within 5 minutes.
What's the difference between an ice bath and a cold shower?
Key Differences:
|
Factor |
Ice Bath |
Cold Shower |
|
Temperature |
10-15°C (controllable) |
15-25°C (varies) |
|
Immersion |
Full body (chest-deep) |
Partial (cascading) |
|
Recovery Effect |
⭐⭐⭐⭐⭐ Strong |
⭐⭐⭐ Moderate |
|
Mental Challenge |
⭐⭐⭐⭐⭐ High |
⭐⭐⭐ Moderate |
|
Convenience |
⭐⭐⭐ Moderate |
⭐⭐⭐⭐⭐ High |
|
Cost |
$500-5,000+ |
Free (water/utility) |
Physiological Distinction: Full immersion creates greater vasoconstriction effect and stronger nervous system response compared to localized cold exposure.
Recommendation: Start with cold showers to build tolerance, then progress to ice baths for enhanced benefits.
Detailed Analysis: Cold showers vs. ice baths comparison
How do I clean and maintain my ice bath?
Maintenance Schedule:
After Each Use (Non-Chiller):
- Drain completely
- Wipe interior with microfiber cloth
- Air dry before storage
- Inspect for punctures/damage
Weekly (Chiller Systems):
- Check filter status (clean if needed)
- Test water pH (6.8-7.4 ideal)
- Rinse and refill if no filtration
Monthly:
- Deep clean with white vinegar solution (1:10 ratio)
- Inspect seals and connections
- Run empty cycle (chillers) to prevent buildup
Quarterly:
- Replace filters (if applicable)
- Descale chiller components
- Professional inspection (commercial units)
Water Treatment Options:
- Chlorine tablets (0.5-1 ppm)
- Ozone generators (chiller add-on)
- UV sanitation (premium systems)
- Hydrogen peroxide (1 cup per 100L)
Setup Guide: How to set up your portable ice bath
What should I do after an ice bath?
Optimal Post-Bath Protocol:
Immediate (0-5 minutes):
- Exit slowly to avoid dizziness
- Dry thoroughly with towel
- Put on warm, dry clothing
- Begin gentle movement (walking)
Short-Term (5-30 minutes): 5. Drink warm beverage (herbal tea, hot water) 6. Continue light activity (stimulates circulation) 7. Layer clothing progressively 8. Avoid hot shower (let body rewarm naturally)
Long-Term (30+ minutes): 9. Consume protein-rich meal (if post-workout) 10. Practice relaxation (breathing, meditation) 11. Monitor how you feel (journal benefits/challenges) 12. Warm shower now acceptable if desired
What NOT to Do:
- Jump in hot shower immediately (thermal shock)
- Drink alcohol (impairs thermoregulation)
- Intense exercise right after
- Ignore persistent numbness/pain
Recovery Enhancement: 5 best recovery tools after workouts
Can ice baths help with weight loss?
Nuanced Answer: Yes, but it's not a magic solution.
Mechanisms:
- Brown Fat Activation: Cold exposure stimulates brown adipose tissue, which burns calories to generate heat
- Metabolic Boost: Short-term increase in energy expenditure (50-100 calories/session)
- Hormonal Effects: May improve insulin sensitivity
Realistic Expectations:
- Direct calorie burn: 50-100 calories per 10-minute session
- Sustainable weight loss: 0.5-1 lb/month (with consistent use)
- Not a substitute: for diet and exercise
Most Effective When:
- Combined with strength training
- Part of healthy nutrition plan
- Consistent practice (4+ times/week)
- Longer sessions (10-15 minutes at 14-15°C)
Detailed Research: Ice bathing and weight loss
How much ice do I need for an ice bath?
Calculation Formula: Ice needed = (Current water temp - Target temp) × Tub volume × 0.5
Practical Examples:
Small Portable Tub (200L):
- Starting temp: 25°C
- Target temp: 12°C
- Ice needed: 13-15 kg (2-3 bags)
Medium Tub (300L):
- Starting temp: 25°C
- Target temp: 12°C
- Ice needed: 20-25 kg (4-5 bags)
Large Professional (500L):
- Starting temp: 25°C
- Target temp: 12°C
- Ice needed: 33-40 kg (7-8 bags)
Money-Saving Tips:
- Fill tub night before, refrigerate in garage
- Use frozen water bottles (reusable)
- Make large ice blocks in containers
- Pre-chill water with cold tap first
Cost Analysis: At $4-6 per 5kg bag, frequent users spend $15-30/week on ice—chiller pays for itself within 2 years.
Complete Guide: How much ice to use in cold plunge
Final Verdict: Our Top Recommendations
Best Overall: Flow Recovery Daily Ice Bath & Chiller
Why It Wins:
- Perfect balance of technology, durability, and price
- Australian company with local support
- WiFi control for modern convenience
- Holistic wellness approach (accessories, education)
- 2-year warranty with responsive service
Ideal For: 90% of home users seeking quality without commercial overkill
Buy Now: Flow Recovery Ice Baths
Best Budget Option: The Cold Plunge Co.
Why It's Great:
- Under $900 entry point
- No electrical setup required
- Surprisingly durable for price
- Perfect for testing commitment
Ideal For: First-timers, renters, travelers
Best Commercial: Syochi Professional Series
Why It Dominates:
- Unmatched durability (5+ year lifespan)
- International certifications
- Trusted by pro sports teams
- Best filtration technology
Ideal For: Gyms, clinics, high-volume facilities
Best Luxury: Chill Tub Australia
Why It's Premium:
- Spa-level aesthetics and performance
- Advanced automation features
- Superior materials and finishes
- Comprehensive warranty/support
Ideal For: Luxury homes, elite athletes, wellness spas
Take Action: Start Your Cold Therapy Journey
Cold therapy isn't just a trend,it's an evidence-based practice with centuries of traditional use and modern scientific validation. Whether you're an elite athlete optimizing performance or someone seeking better sleep and stress management, there's an ice bath solution for you.
Next Steps:
- Assess Your Needs: Review the buying guide and determine your priorities
- Set Your Budget: Understand total cost (equipment + ongoing expenses)
- Choose Your Supplier: Use our reviews to shortlist 2-3 options
- Start Gradually: Follow beginner protocol (avoid going too extreme initially)
Track Progress: Journal your experience for 30 days
Flow Recovery
Top 5 Best Ice Bath Suppliers in Australia
Key Takeaways Cold water therapy reduces muscle soreness by up to 20% (2025 meta-analysis) Australia's ice bath market grew 24% in 2024, reaching $8.7M Optimal recovery: 11-15°C for 10-15 minutes...
Flow Recovery

Ice Bath Tubs 2025: The Smart, Sustainable Wellness Revolution
Quick Summary
Just a few years ago, ice baths were something you’d find in professional training rooms or elite sports facilities. Today, they’re showing up everywhere, in backyards, home gyms, and wellness studios.
The world of recovery has changed. Cold therapy has moved from a niche athletic practice to a mainstream wellness ritual. And in 2025, it’s getting smarter, more sustainable, and easier to make part of everyday life.
We’ve seen it happen firsthand, people are no longer chasing performance alone. They’re looking for balance, resilience, and a simple way to reset their mind and body. That’s where the new generation of ice bath tubs comes in.
From Ice Buckets to Smart Recovery Systems
Remember when recovery meant hauling bags of ice into a bathtub? Those days are gone. Ice baths have evolved far beyond that.
Today’s ice bath tubs are built with precision and innovation. Instead of guessing the temperature or constantly adding ice, smart systems now control every element for you. The water stays at your chosen temperature, the filtration keeps it clean, and the insulation ensures energy efficiency.
It’s a perfect blend of science and comfort. No mess, no uncertainty, just a consistent, controlled environment that helps your body recover faster and your mind relax deeper.
That’s the difference in 2025. Recovery has become smarter, safer, and far more accessible.
Why Everyone’s Talking About Ice Baths
So, why is everyone suddenly getting into cold therapy? It’s not just a fitness trend anymore. It’s a lifestyle shift.
People are becoming more aware of the connection between the body and the mind. Ice baths aren’t just about reducing soreness or muscle fatigue. They’re about regulating stress, improving focus, and building mental resilience.
We’re also living in an era where wellness is personal. From busy professionals to weekend runners, everyone wants routines that restore energy and mental clarity. Cold exposure delivers exactly that, a few minutes of stillness that leave you calm, alert, and grounded.
The growing number of portable and affordable options has made this practice easier than ever to try. Cold therapy is no longer limited to athletes, it’s for anyone ready to take their wellbeing seriously.
Smart Technology Meets Wellness
Technology has redefined how we approach recovery. The latest ice bath tubs are designed for control and consistency.
Many models now come with built-in digital thermostats, ensuring the water stays at the perfect temperature for your comfort and goal. Some have companion apps that track your sessions, so you can monitor your progress over time.
There are also energy-efficient cooling systems that help save power while maintaining the chill. A few even include timers, LED lights, and ergonomic seating for a more enjoyable experience.
This kind of technology doesn’t take away from the raw, grounding nature of cold therapy. Instead, it enhances it. It gives you confidence that you’re recovering safely and efficiently. The future of ice baths is not about making them easier, it’s about making them smarter.
Sustainability Becomes Essential
Wellness and sustainability are now deeply connected. People care not only about what helps their body but also what impacts the planet.
The new generation of ice bath tubs reflects that shift. They’re built to be energy-efficient, using advanced insulation and smart cooling systems that reduce waste. Many are made from durable, eco-friendly materials designed to last.
Some modern tubs also include water circulation systems that keep the water clean for longer periods, reducing how often it needs to be replaced. That’s good for the environment and your utility bill.
We believe recovery should move forward responsibly. The evolution of sustainable design in wellness gear is a reminder that self-care and planet care can go hand in hand.
Cold Therapy at Home: Accessible and Simple
One of the biggest changes in 2025 is how accessible ice baths have become. You don’t need a huge backyard or a fitness studio anymore. Compact, portable designs mean you can set up your own recovery station almost anywhere, balcony, bathroom, or garage.
The convenience of quick setup and easy drainage has made cold therapy part of daily life for many people. It’s no longer something you need to plan around. A few minutes each morning or after a workout can now be part of your normal routine.
This shift toward everyday recovery is powerful. It helps people stay consistent, which is the key to long-term results. The more accessible the process, the more it becomes a habit instead of a challenge.
The Science and the Experience
The science behind cold exposure is impressive, but the experience itself is what keeps people coming back.
Cold therapy triggers your body’s natural healing response. It reduces inflammation, improves circulation, and releases endorphins that make you feel alert and positive. Studies show it can boost dopamine levels, sharpen focus, and even help with better sleep.
But beyond the science, there’s something deeply grounding about the practice. The moment you lower yourself into the cold, your breath shortens, your body tenses, and your mind protests. Then, as you focus on breathing and staying calm, a wave of stillness takes over.
That moment, between discomfort and control, is where the magic happens. It’s not just recovery; it’s presence.
Looking Ahead: The Future of Cold Therapy
The cold therapy movement is growing fast, and 2025 is only the beginning. We’re seeing more personalized features, better technology, and a stronger focus on community.
Soon, smart tubs will connect with wearables to track heart rate and nervous system recovery in real time. Designs will continue to become more sustainable and energy-conscious. And as people share their progress online, the cold therapy community will keep inspiring others to begin their own journey.
What’s happening right now is more than a wellness trend, it’s a shift in how we understand recovery. It’s about finding clarity, strength, and calm through controlled discomfort. It’s about using modern innovation to connect with ancient wisdom.
Conclusion
The ice bath tubs of 2025 represent more than an upgrade in technology, they represent a change in mindset. Recovery is no longer a chore or a luxury. It’s becoming a lifestyle, one built on balance, resilience, and awareness.
We believe that everyone deserves access to recovery tools that are simple, sustainable, and effective. The future of cold therapy is already here, smarter, cleaner, and designed for real life.
If you’re ready to experience the power of cold exposure and step into the next era of wellness, we’re here to help you get started.
Step into the future of recovery with us.
Frequently Asked Questions
-
What makes modern ice bath tubs different from traditional ones?
Modern ice bath tubs are designed for precision and comfort. Unlike traditional setups that required bags of ice and constant refills, today’s tubs use smart temperature control, filtration, and insulation systems. You can set your desired temperature and enjoy a consistent, hassle-free cold therapy experience. -
Are ice bath tubs in 2025 eco-friendly?
Yes, most new models are built with sustainability in mind. They use energy-efficient cooling, improved insulation, and durable materials to reduce waste. Some even feature water circulation systems to limit how often you need to change the water. -
Do I need to be an athlete to use an ice bath tub?
Not at all. Cold therapy has become a wellness habit for everyone, from athletes and fitness enthusiasts to people looking for better sleep, lower stress, or mental clarity. It’s a simple way to support recovery and boost overall wellbeing. -
How cold should the water be for an ice bath?
For beginners, around 10–15°C is a good starting range. You don’t have to go to extremes. The benefits come from consistency, not shock. As your body adapts, you can experiment with slightly colder temperatures. -
How long should I stay in an ice bath?
Start small, even 1 to 2 minutes is enough when you’re just beginning. With time, you can increase the duration up to 5 or 10 minutes, depending on comfort. Always focus on breathing slowly and staying relaxed throughout the session. -
Are smart ice bath tubs safe to use at home?
Yes, they’re designed with safety in mind. Most modern tubs feature temperature control, timers, and insulated materials that make home use simple and secure. Always follow the manufacturer’s instructions and listen to your body. -
Can ice baths really help with stress and mental health?
Absolutely. Cold exposure activates your nervous system in a way that improves focus and mood. It helps balance stress hormones and releases endorphins, those “feel-good” chemicals that leave you calm and energized. -
What kind of maintenance do ice bath tubs require?
Most new models are easy to maintain. Smart tubs often come with filtration systems that keep the water clean and fresh. You’ll only need to change the water occasionally and wipe down the surface after use. It’s simple, quick, and efficient. -
How often should I do cold therapy?
You can start with 2–3 sessions per week and adjust as your body adapts. Some people prefer a quick daily plunge, while others do it after workouts or on recovery days. The key is to stay consistent and make it part of your lifestyle. -
How can I get started with my own ice bath setup?
You don’t need much to begin, just the right mindset and a reliable setup. We offer modern recovery gear designed to make cold therapy simple, sustainable, and effective for everyone.
Flow Recovery
Ice Bath Tubs 2025: The Smart, Sustainable Wellness Revolution
Quick Summary Ice baths have evolved from messy DIY setups to smart, sustainable recovery systems designed for everyday wellness. In 2025, modern ice bath tubs feature precise temperature control, filtration,...
Flow Recovery
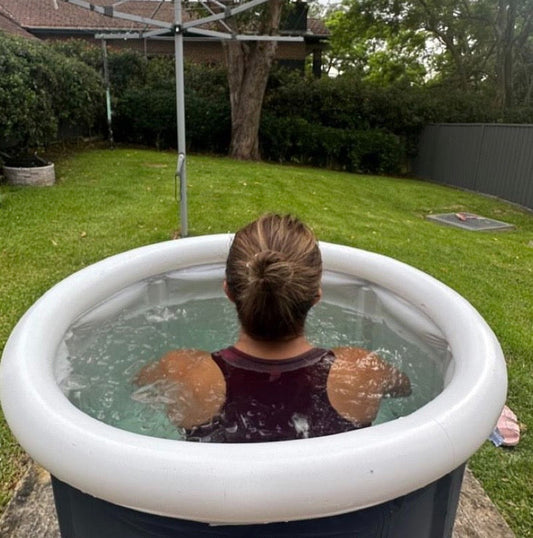
Overcoming Fear: Cold Exposure Challenges and Community Support for Newbies
Key Takeaways:
- Fear is normal. Everyone feels nervous before stepping into the cold. The key is to start small and breathe through the discomfort.
- Your body adapts fast. The initial shock fades quickly as your system learns to stay calm and balanced.
- Breathing is everything. Slow, steady nasal breathing helps control your mind and keeps your body relaxed during exposure.
- Start simple, stay consistent. Begin with short cold showers or brief dips. Over time, your comfort and confidence will grow naturally.
- Community makes it easier. Sharing the journey with others helps you stay motivated, supported, and inspired.
- Cold exposure builds more than recovery. It strengthens resilience, improves mental clarity, and teaches emotional balance.
- Small wins matter. Every time you face the cold, you train your mind to stay strong under pressure.
- It’s a journey, not a competition. Progress at your own pace, every second in the cold counts.
- Combine breath and recovery. Mindful breathing and cold therapy work together to build both physical and emotional strength.
Cold exposure may look simple from the outside, you sit in ice-cold water, breathe deeply, and try to stay still. But anyone who has ever tried it knows that it’s not as easy as it seems. The first dip takes courage. Your body resists instantly, your mind tells you to get out, and the fear feels real and overwhelming.
That fear, however, is completely normal. Everyone who starts cold therapy experiences it in the beginning. The good news is that fear doesn’t last forever. With a little understanding, patience, and support, it slowly fades away, and in time, it can even turn into excitement.
Why Cold Exposure Feels Scary
Let’s be honest, stepping into freezing water goes against our natural instincts. Our bodies are wired to stay warm and comfortable, so when we suddenly feel the shock of the cold, the brain immediately sends out an alarm. Heart rate spikes, breathing quickens, and muscles tighten.
This is the body’s built-in fight-or-flight response. It’s not weakness, it’s pure biology. Your system thinks it’s in danger and reacts accordingly. But here’s the key: when you stay calm, breathe slowly, and ride through those first few moments, something incredible happens. The panic starts to fade, your focus sharpens, and the fear loses its grip.
Understanding What’s Happening in Your Body
During the first minute of cold exposure, your body goes into full alert mode. Adrenaline surges, blood rushes toward your vital organs, and your heart begins to beat faster. It’s your body’s way of saying, “Hold on, we’ve got this.”
After those initial moments, your system starts to settle. Breathing slows, the mind quiets down, and you realise something you didn’t expect, you can actually be in the cold. That moment of calm shows that your body is already adapting.
The Breathing Connection
Breathing is your greatest tool against fear. Most people who panic in the cold do so because they lose control of their breath. Focusing on slow, deep nasal breathing changes everything.
Inhale through your nose, exhale slowly through your mouth. Each controlled breath tells your body that it’s safe and not under threat. Over time, this pattern rewires your stress response, not only during cold exposure but in your everyday life as well.
That’s also why we care so much about breathing techniques and tools. Better breathing leads to better recovery, sharper focus, and greater emotional balance. When you combine effective breathing with consistent cold therapy, the results are powerful and long-lasting.
Starting Small
You don’t need to jump straight into a five-minute ice bath. The best approach is to start small and stay consistent. It’s about building confidence, not endurance.
Here’s an easy way to begin:
- Start with regular showers, ending the last 15–30 seconds with cold water.
- Gradually increase the time as your body gets used to the sensation.
- When you’re ready, move to short ice baths, begin with 30 seconds and extend slowly.
- Track your progress, and celebrate each milestone, no matter how small it seems.
Consistency matters far more than duration. The goal isn’t to prove how long you can last, but to build trust with yourself. Each session becomes an act of quiet courage, one that strengthens both body and mind.
The Mind Game
Cold exposure isn’t only a physical challenge, it’s a mental one. Every time you step into the cold, you’re practicing both surrender and strength. You’re teaching yourself to stay composed in discomfort, which is one of the most valuable lessons there is.
Many people describe the cold as a mirror. It reflects your inner state. If you go in tense, the resistance feels greater. But if you enter with calm acceptance, you often find peace in the process.
That’s why cold therapy is as much about mindset as it is about temperature. Over time, you begin to notice a pattern: the way you handle the cold mirrors how you handle life. The practice teaches patience, discipline, and emotional steadiness, qualities that carry far beyond the ice.
The Role of Community
One of the best ways to overcome fear is by not doing it alone. Having a supportive community around you changes everything. When you see others facing the same challenge, something inside you relaxes. The cold no longer feels like an enemy; it becomes a shared experience.

That’s what we believe in. Cold exposure is powerful on its own, but community turns it into something transformative. When people share their first dips, their routines, and their progress, they form real connections. Each story becomes a reminder that it’s okay to be scared, okay to start small, and okay to keep showing up.
Together, we learn to laugh through the shivers and celebrate every little victory. That collective energy transforms fear into motivation, and motivation into lasting growth.
What You Gain From Facing the Cold
The benefits of cold exposure go far beyond physical recovery. Sure, it improves circulation, reduces inflammation, and boosts metabolism, but the real transformation happens on the inside.
After a few consistent sessions, most people notice powerful changes:
- Better sleep and deeper rest.
- More mental clarity and focus.
- Reduced anxiety and improved emotional balance.
- A steady sense of confidence that carries through the day.
Cold therapy strengthens the nervous system, helping it stay calm under stress. It teaches you that comfort isn’t the goal, growth is. And once you experience that, the fear that once held you back begins to look more like freedom.
From Fear to Flow
We’ve seen this transformation countless times. Someone hesitates at the edge of an ice bath, dipping a toe in and pulling back. They try again, a foot, then a leg, until finally, they take the full plunge. There’s a sharp inhale, a flicker of shock, and then, suddenly, a smile.
That’s the moment fear turns into flow. It’s a moment of presence and power, pure awareness. The body is cold, but the mind is alive. And that state is available to anyone who is willing to step in, breathe through it, and trust the process.
Conclusion: Step In, The Cold Is Waiting
Everyone begins with fear, and that’s okay. Fear is part of the journey. The cold is not here to punish you; it’s here to teach you. It rewards patience, courage, and curiosity.
We believe recovery should be simple, accessible, and empowering. With the right tools, mindset, and community, you can turn fear into your greatest strength.
So take that first step. Breathe in deeply. Step forward with confidence. Let the cold remind you what you’re truly capable of.
Ready to begin your cold exposure journey?
Join us and explore our range of recovery tools designed to make your first, and every, session smoother, safer, and more empowering.
Start your journey with us today.
Frequently Asked Questions
-
Is it normal to feel scared before my first ice bath?
Absolutely. Everyone feels nervous before their first dip. The body naturally reacts to cold as a form of stress. With slow breathing and a calm mindset, that fear quickly fades after a few sessions. -
How long should I stay in the ice bath as a beginner?
Start small. Even 30 seconds to 1 minute is enough for your first few times. Focus on your breath rather than time. You can gradually increase the duration as your body adapts. -
How cold should the water be for beginners?
A good starting point is around 10–15°C. It’s cold enough to activate your body’s recovery response but not so cold that it feels unbearable. You can reduce the temperature as your comfort grows. -
What should I do if I start to panic during a session?
That’s completely okay. Just focus on slowing down your breathing. Inhale through your nose, exhale slowly through your mouth. If it feels overwhelming, step out and try again later. Consistency helps your body adjust over time. -
Can cold exposure help with mental health and anxiety?
Yes. Many people find that regular cold exposure helps reduce stress and anxiety. It teaches your body to stay calm under pressure and boosts feel-good hormones like endorphins and dopamine. -
Is cold therapy safe for everyone?
Most healthy people can safely practice cold therapy. However, if you have heart conditions, high blood pressure, or other health issues, it’s best to check with a doctor first. Always listen to your body. -
How often should I do cold exposure?
You can start with 2–3 sessions per week. Some people enjoy daily short cold showers, while others prefer a few ice baths each week. There’s no strict rule, find what works best for your body and schedule. -
What should I do after an ice bath?
Warm up slowly. Towel off, dress warmly, and move around gently. Avoid jumping into hot water immediately after, it can cause dizziness. Let your body warm itself naturally when possible. -
How can community support help me stay consistent?
Having others on the same journey makes a big difference. Sharing progress, struggles, or even a laugh after a cold plunge keeps you motivated. That’s why we love creating spaces where people can connect, learn, and grow together. -
How can I start my cold exposure journey with the right tools?
Start simple. All you need is cold water, steady breathing, and a little courage. We offer easy-to-use recovery gear designed to make your first and every session safe, comfortable, and empowering.
Flow Recovery
Overcoming Fear: Cold Exposure Challenges and Community Support for Newbies
Key Takeaways: Fear is normal. Everyone feels nervous before stepping into the cold. The key is to start small and breathe through the discomfort. Your body adapts fast. The initial...
Flow Recovery
Mouth Taping While You Sleep: Health Benefits, Risks & What the Latest Research Really Says
Quick Summary
What it is: Mouth taping involves placing a gentle, skin-safe strip over your lips while sleeping to promote nasal breathing.
Why it matters: Nasal breathing filters and humidifies air, boosts oxygen flow, and helps your body produce nitric oxide, improving sleep and recovery.
Health benefits:
- Better, deeper sleep and fewer wake-ups
- Reduced snoring and dry mouth
- Improved oral health and hydration
- Calmer breathing and lower anxiety
- Enhanced oxygen uptake and recovery quality
Latest research says: Early studies show mouth taping may improve sleep efficiency, oxygen levels, and heart rate variability (HRV), but more large-scale research is needed.
Risks to know: Avoid if you have nasal congestion, allergies, or sleep apnea. Always use medical-grade, breathable tape made for sleep.
How to start safely: Begin with a small vertical strip, test for comfort, and use only when nasal breathing feels clear and easy.
Introduction
You’ve probably seen it online, someone sleeping peacefully with a small piece of tape across their lips.
It looks a bit odd, right? But this simple bedtime habit, called mouth taping, is gaining serious attention in the wellness world. From fitness influencers to everyday people trying to sleep better, everyone’s talking about how this small strip of tape might lead to calmer nights, better recovery, and even clearer mornings.
So what’s really going on here? Is mouth taping just another sleep trend, or is there real science behind it? Let’s find out what the research says, what people are actually experiencing, and a few insights most articles don’t tell you.
What Is Mouth Taping, Exactly?
Mouth taping is exactly what it sounds like: placing a gentle, skin-safe piece of tape across your lips before bed to keep your mouth closed while you sleep.
The goal isn’t to stop breathing, it’s to encourage nasal breathing, which is how your body was designed to take in air when you’re at rest.
Nasal breathing helps filter, warm, and humidify the air before it enters your lungs. It also naturally controls your breathing rate and supports oxygen flow.

Many people try mouth taping to reduce snoring, wake up with a less dry mouth, or just feel more rested. It’s also popular among athletes and wellness fans who want to optimize their recovery and oxygen balance.
Why Nasal Breathing Matters
If you’ve ever woken up with a sore throat, dry mouth, or groggy feeling, there’s a good chance you were breathing through your mouth overnight.
That’s not ideal.
When you breathe through your nose instead of your mouth, something amazing happens, your body produces a gas called nitric oxide. This gas helps open up your blood vessels, improves circulation, and even boosts oxygen absorption in your cells.
In other words, nasal breathing helps your body work more efficiently while you sleep.

It also calms your nervous system. Breathing slowly and quietly through your nose signals your body to relax, lowering heart rate and stress hormones. That’s why people who start mouth taping often say they wake up feeling more rested and balanced, not just physically but mentally too.
The Benefits People Notice First
People who’ve tried mouth tapes often report small but powerful changes within a week or two.
Here are some common benefits:
1. Better Sleep Quality
Less tossing and turning, fewer nighttime wake-ups, and a more refreshed feeling in the morning.
2. Reduced Snoring
When your mouth stays closed, your tongue naturally rests in the right position, keeping the airway open and reducing vibrations that cause snoring.
3. Improved Oral Health
No more waking up with dry mouth or bad breath. Nasal breathing keeps the mouth moist and balanced, preventing bacteria buildup.
4. Deeper Breathing and Oxygen Flow
Nasal breathing allows more consistent oxygen exchange, helping your cells recover and recharge while you sleep.
5. Lower Anxiety Levels
Breathing through the nose slows down your rhythm, activating your body’s “rest and digest” mode, making you calmer and less anxious over time.
And here’s something new that often gets overlooked:
Regular mouth taping can help retrain your breathing habits.
Many of us breathe too quickly or too shallowly during the day, especially under stress. Sleeping with your mouth gently taped helps your body remember how to breathe deeply through the nose, even when you’re awake. Over time, this can reduce daytime stress, improve focus, and even support better athletic performance.
The Risks (and How to Avoid Them)
Like any wellness habit, mouth taping isn’t for everyone.
If you have severe nasal congestion, allergies, or a diagnosed sleep disorder like sleep apnea, you should talk to a doctor before trying it.
Mouth taping can also feel strange at first. Some people experience mild anxiety or panic, especially during the first few nights. This usually fades once the body adjusts, but if it doesn’t, it’s okay to stop.
Other possible issues:
- Skin irritation from strong adhesives.
- Discomfort from full-coverage tape.
- Difficulty breathing if your nasal passages are blocked.
The safest way to start is with medical-grade, breathable mouth tape that’s made specifically for sleep. Flow Recovery’s Mouth Tape is a great example, it’s soft, hypoallergenic, and allows partial airflow. That means you can get used to the feeling safely and gradually.
If you’re nervous, start small. Try it for short naps, or use a vertical strip instead of a full seal. You don’t have to go all in from day one.
What the Latest Research Really Says
Researchers and sleep experts agree on one thing, mouth taping shows promise, but it’s still an area being explored. What we know so far points to some encouraging patterns.
People who switch to nasal breathing during sleep often experience less snoring, better oxygen levels, and deeper rest. Early research also suggests that consistent nasal breathing can support healthier heart rhythms and improved recovery by keeping the body in a calmer state overnight.
What’s interesting is how these small changes in breathing can affect your overall wellbeing. When your breathing stays steady through the night, your nervous system remains balanced, helping your body repair more efficiently and your mind wake up clearer.
So, while mouth taping isn’t a miracle solution, it’s becoming clear that this simple habit can have a meaningful impact, especially for those looking to improve their sleep quality, focus, and recovery naturally.
How to Start Mouth Taping Safely
Here’s a simple step-by-step guide if you want to try it:
- Choose the right mouth tape. Use only medical-grade, skin-friendly tape, never regular tape.
- Test for sensitivity. Place a small piece on your hand to check for irritation.
- Start with a small strip. Try a vertical piece that leaves room on the sides of your lips.
- Clear your nose. Make sure you can breathe easily before taping.
- Ease into it. Try for short naps first.
- Observe your sleep. Notice if you wake up feeling more alert or hydrated.
- Stop if uncomfortable. If you feel anxious or short of breath, remove it immediately.
Conclusion: Small Tape, Big Impact
Mouth taping may look simple, but its impact can reach every corner of your wellbeing, from how you breathe to how deeply you rest.
It’s not a cure-all, and it’s not for everyone, but for many, it’s a quiet game-changer.
If you’re curious, start small, listen to your body, and use a gentle, high-quality tape made for the job.
Flow Recovery’s Mouth Tape is designed for safe, comfortable use, helping you breathe better, sleep deeper, and wake up feeling your best.
Because sometimes, better recovery starts with one small strip of tape, and one good night’s sleep.
Frequently Asked Questions
-
What exactly is mouth taping?
Mouth taping involves placing a gentle, skin-safe strip of tape across your lips before sleep. It encourages nasal breathing instead of mouth breathing, which can help improve sleep quality, reduce snoring, and support recovery.
-
Is mouth taping safe to try at home?
Yes, for most healthy people, mouth taping is safe when done correctly with medical-grade, breathable tape. However, people with nasal congestion, sleep apnea, or severe allergies should speak to a doctor first. Flow Recovery’s Mouth Tape is specially designed to make this practice comfortable and safe for beginners.
-
What are the main benefits of mouth taping?
People who try mouth taping often report deeper sleep, less snoring, fewer dry-mouth mornings, and improved energy levels. Over time, it can help train your body to breathe calmly and efficiently through the nose, which also supports better recovery.
-
Can mouth taping really stop snoring?
It can help reduce snoring for many people, especially those who snore because they breathe through their mouths at night. However, it may not work for everyone, especially if snoring is caused by blocked nasal passages or sleep apnea.
-
What does science say about mouth taping?
Early studies show that promoting nasal breathing during sleep can reduce snoring, improve oxygen flow, and support better sleep quality. While researchers agree that more evidence is needed, the current findings are positive.
-
How do I start mouth taping safely?
Start by using a small, vertical strip in the center of your lips, leaving space on the sides. Make sure your nose is clear and you can breathe comfortably before sleeping. Use soft, hypoallergenic tape like Flow Recovery’s Mouth Tape to prevent irritation and make the experience more comfortable.
-
Can I use regular tape for mouth taping?
No. Never use duct tape, medical tape, or any adhesive not designed for the face. These can cause irritation or block airflow. Always use a tape made specifically for sleep and breathing practices.
-
What if I feel anxious or can’t sleep with my mouth taped?
That’s totally normal at first. Some people feel a little uneasy until they get used to it. Try taping for short naps or for a few minutes before bed to adjust gradually. Flow Recovery’s breathable tape design helps reduce that “sealed” feeling and makes the habit easier to build.
-
How long does it take to notice results?
Many people start noticing changes, like waking up more refreshed or with less snoring, within a week or two. For deeper breathing improvements, consistency matters. Make it part of your nightly routine for at least 2–3 weeks.
-
Can I combine mouth taping with nasal strips or other recovery tools?
Absolutely. In fact, using nasal strips to open your airways can make mouth taping even more effective. Many Flow Recovery users combine mouth tape with nasal strips, cold therapy, or breathing exercises for a complete recovery routine.
Flow Recovery
Mouth Taping While You Sleep: Health Benefits, Risks & What the Latest Research Really Says
Quick Summary What it is: Mouth taping involves placing a gentle, skin-safe strip over your lips while sleeping to promote nasal breathing. Why it matters: Nasal breathing filters and humidifies...
Flow Recovery